12 Ways to Shoot the Perfect Travel Photograph

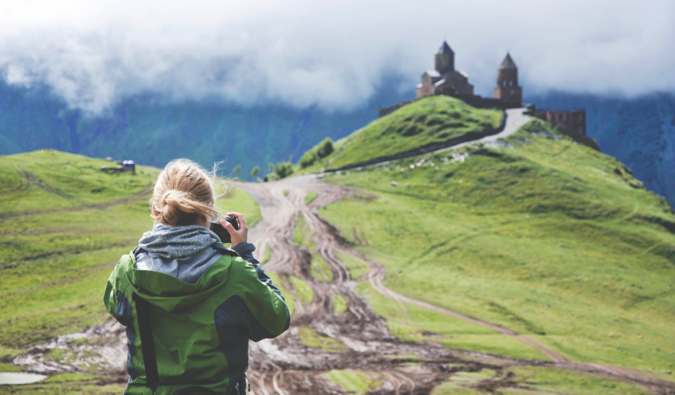
a woman taking a photo
Updated: 12/2/2018 | December 2nd, 2018

­Today, professional photographer Laurence Norah of Finding the Universe, continues his five-part series on taking better travel photos. Photographs are important for the memories they represent so Laurence is here to help us take better pictures! Part two of the series is on how to get the perfect shot.

In my first post in this series, I talked about the key compositional rules that you can use to create better travel photos. If you’re new to this series, I recommend you start there.

Today I’ll be covering how to deal with challenging light and some introducing some advanced ideas for controlling your composition, including being selective with your focus and making objects seem closer together than they are.

Then I’m going to get into specific tips for common travel scenes to get you taking better photos faster.

I’ll begin, though, by talking about the most crucial element of photography — the light. The middle of a sunny day might seem perfect for photography. In truth, it’s the worst time to take pictures — the light is harsh, shadows are challenging, and your photos will not do your subjects justice.

The best times to shoot are closer to sunrise and sunset when the light is soft and warm. These times are known as “the golden hour.”

You can’t be everywhere at the right time for the perfect light, especially when traveling. Here’s how to get the best shot from a bad lighting situation.

12 Ways to Take Better Photos

1. Be Aware of the Sun

This is the most important tip of the lot. Ideally, you want the sun behind you so that your subject is fully lit. If the sun is behind your subject you’ll end up with a much darker, poorly lit image. While this can be done intentionally for effect, for most shots you’ll want the sun to properly light your subject. To do that, position yourself so you are between the sun and your subject, as I did in this shot from my journey around New Zealand:
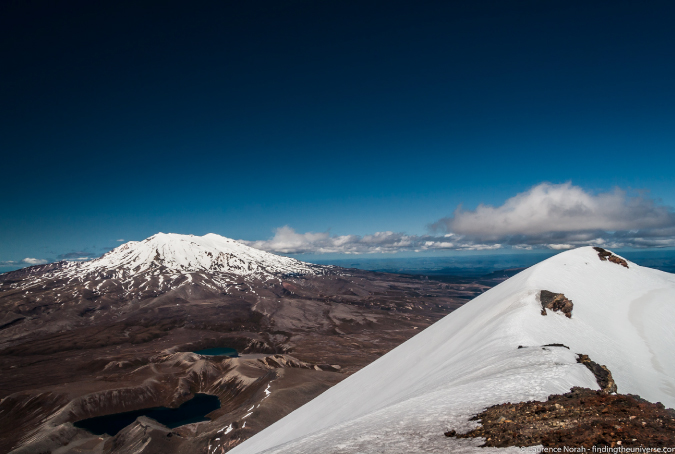
beautiful travel photograph of a snow-capped mountain in New Zealand

2. Get Creative

Don’t just take the same shot every time. Mix it up and get creative. Instead of having the sun behind you, take advantage of the harsh light for a more interesting image. Try shooting into the sun to create silhouettes, or use a high aperture to create a starburst effect, like in this Napa Valley balloon photo:
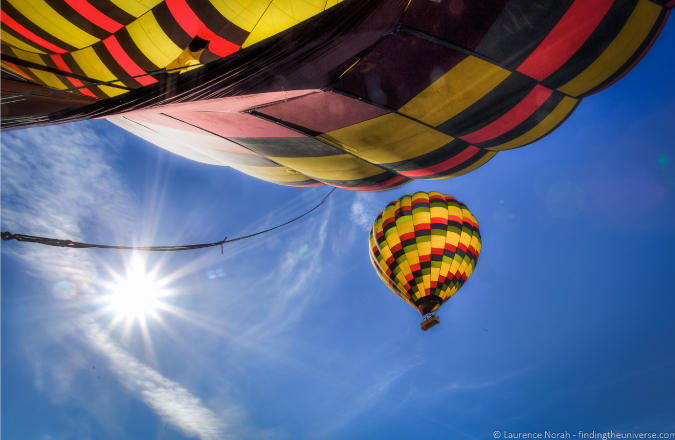
Dazzling picture of hot air balloons in Napa Valley, CA

3. Use the Weather

Think about how you can use the weather to your advantage. How can you embrace a grey sky or a rainy landscape to capture a unique photo? How can you snap a picture of a blue sky without it being boring? Be aware of the weather so you can adjust your style and subject accordingly. For example, when the sun is behind clouds, the light is diffused. Clouds also add interest and scale to otherwise plain, boring skies, as in this shot of the Painted Desert in Australia:
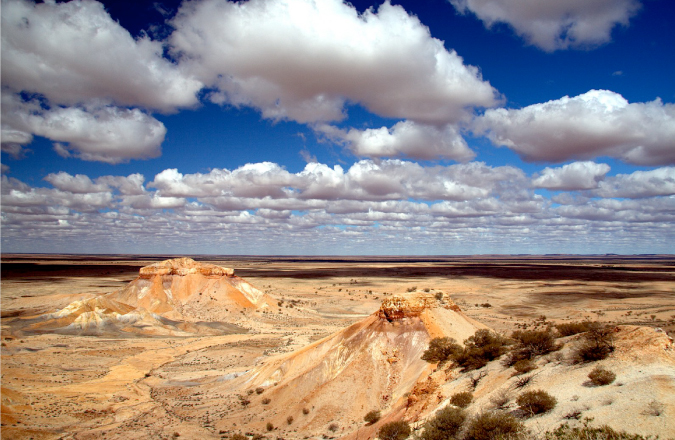
Using weather to a photographers advantage when taking a pic of the mountains and sky Painted Desert

4. Seek Shade

If you’re taking pictures of people, find somewhere shady. Here the light will be more even, with fewer harsh shadows on faces. You’ll get a much smoother and more balanced photo. Just make sure you are mindful of where your light is and how dark your subject will be. Here’s an example from the middle of the day in Sri Lanka:
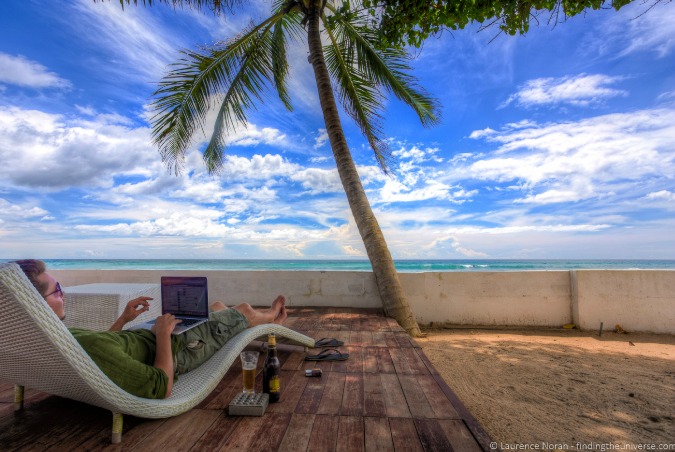
Remote worker working on a laptop traveling to a beach location

5. Master Depth of Field

Depth of field is all about controlling which parts of the shot are in focus. It’s one of the most important photography concepts you’ll need to know if you want to improve your travel photography and capture that perfect shot. Mastering depth of field will allow you to compose a variety of shots just by changing where your focus is. For example, check out this shot of a monkey:
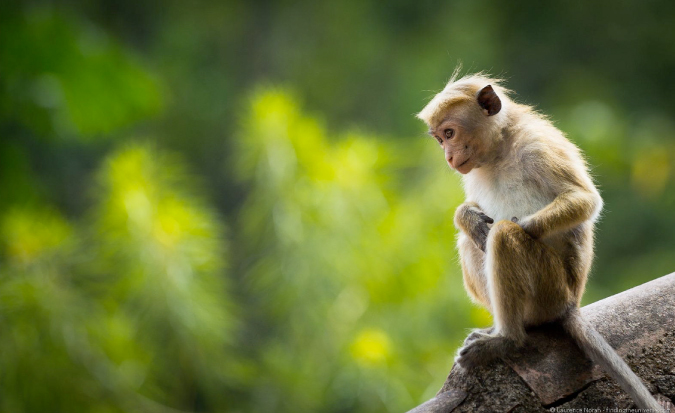
Cute monkey photographed while traveling

As you can see, only the monkey is in focus. This is known as a “shallow” depth of field and is used to isolate subjects and make the shot about them.

A wide depth of field is for shooting landscapes and scenery. Here’s a shot from New Zealand where I used a wide depth of field to get much more of the scene in focus:
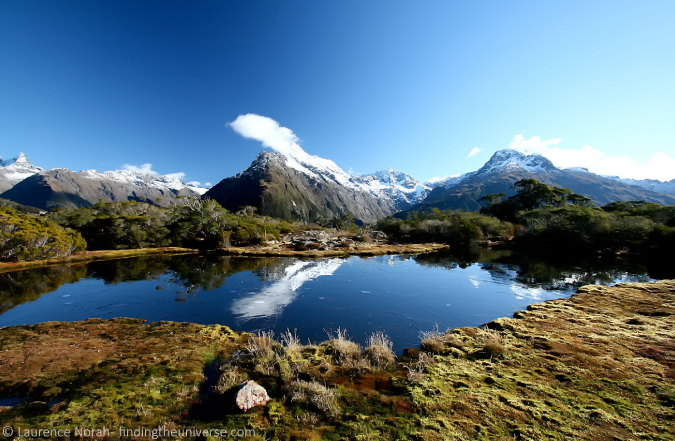
Stunning travel photo of a mountain range in New Zealand

To manipulate depth of field on your camera you need to change the aperture — check your manual for how to do that. Typically it will be marked as “Av” or “A” on your mode dial.

Some smartphones allow you to manually set your aperture, either through the built-in camera app, or by downloading an advanced app from your device’s app store.

A wide-open aperture (f/4 and lower) produces a shallower depth of field (less of the shot will be in focus), and a smaller aperture (f/8 and higher) puts more of the scene in focus.

There are plenty of tutorials on the Internet about depth of field; take a look here for a more detailed explanation, and here for a depth of field simulator to get more of a handle on what it is.

6. Utilize Street Scenes

Street photography is about capturing moments — immersing yourself in environments and finding interesting stories.

Patience and politeness are key to successful street shots involving people — not everyone wants to have their photograph taken, and it may be illegal to do so without explicit permission. If no one wants their photo taken, try wider crowd shots, or focus in on market goods — colorful spice piles or unusual-looking goods are always interesting subjects. Alternatively, shoot the streets themselves. Doorways or intriguing architecture are a nice starting point — take this street in Bologna, Italy, for example:
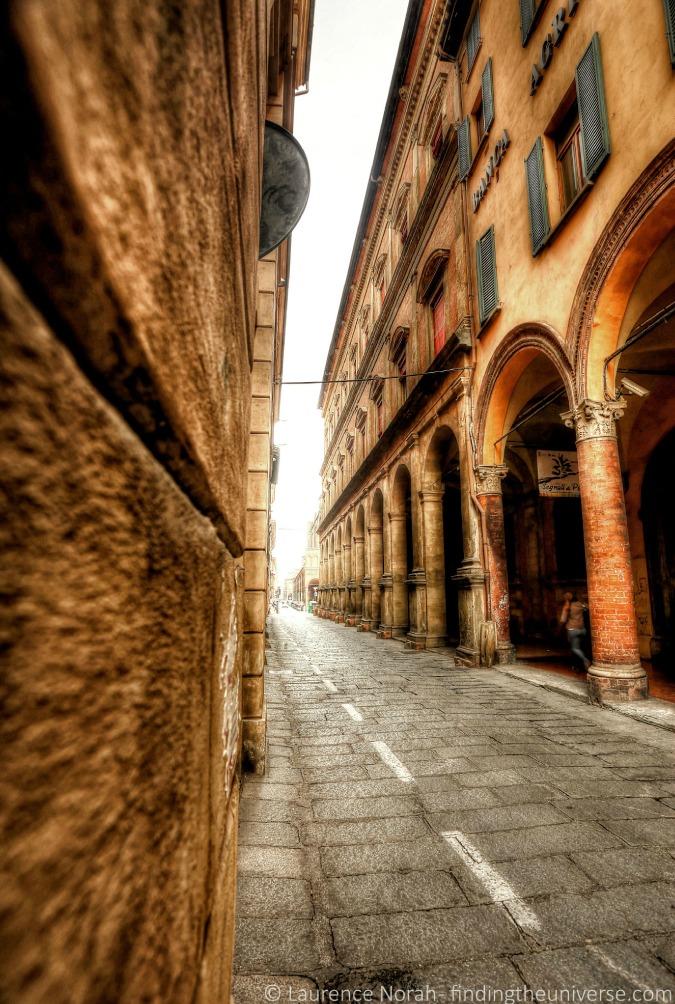
Stunning travel photo of gorgeous street in Bologna, Italy

As for the settings, use a wider depth of field (smaller aperture) for general street scenes.

7. Learn to Photograph People

If you’re looking for portraits, your best bet is to make friends with people. Learn about them and their stories, then ask for that permission.

I prefer taking pictures of people I know, as I generally don’t have to worry about permission problems.

My favorite style of people photos is “candid,” unposed shots. This is the best way, in my opinion, of capturing the personality of people.

Candid travel picture of two people hugging at a party

The key to the art of unobtrusive photography is persistence, patience, and keeping your eyes open to the photographic possibilities around you. Anticipating the moments that might be about to happen is key.

I’d advise a shallow depth of field (wide aperture) and fast shutter speeds for portraits and action shots of people.

8. Use Beaches

Beaches are one of my favorite spots to shoot sunsets — nothing quite beats the sun setting over the sea! The water and the wet sand make for great reflection opportunities.

Think carefully about your composition, and in particular the foreground and mid-ground of your shot, as I talked about in the composition post. Try different angles, and maybe get above your subject to present the beach in the context of its environment, like this shot of Hellfire Beach in Western Australia:
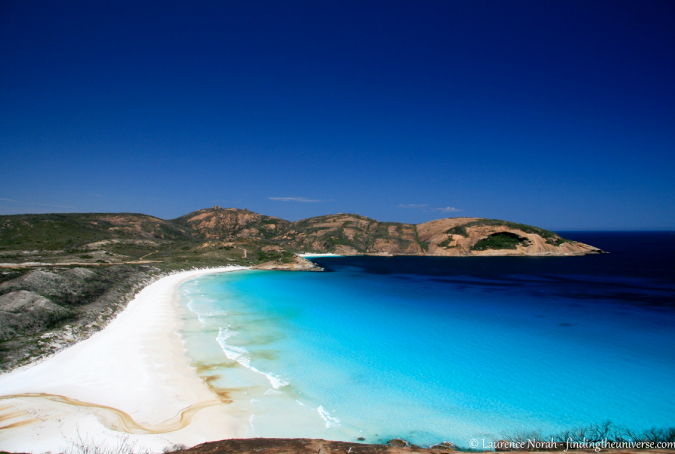
Shot of sunny Hellfire Beach in Western Australia

Outside of sunset, beaches can be very bright environments, so you may need to adjust your exposure to compensate. Most cameras and phones let you shift exposure left or right manually with a button that looks like +/-, or from inside the app.

If you are shooting friends and can’t find shade, consider setting your camera’s flash to “fill” setting to compensate. This uses the flash to light up the shadows caused by the sun, and can make portraits shot into the sun look more pleasing.

Finally, take care of your gear. Fine sand and salt water don’t agree with most camera equipment! Here are some more beach photography tips to get you started.

9. Master Taking Pictures of Landscapes

There are two things that helped my landscape photography improve: a tripod and a polarizing filter (if you’re interested in my photography equipment, here’s a full list of my travel photography gear).

Controlling depth of field is a key part of landscape photography. Unfortunately, as you increase the aperture the shutter speed becomes slower — to the point where your hand movement can result in a blurry image. This is why you need a tripod.

Read more about how shutter speed, ISO (light sensitivity setting), and aperture are linked in this article on the exposure triangle.

A polarizing filter is fantastic for making blue skies and clouds pop, and for controlling reflections. It also reduces the amount of light entering the camera, so that tripod is even more helpful.

If the above two sound like too much effort, don’t worry. You can improve your landscape photography no end by thinking seriously about your composition. Leading lines, the rule of thirds, and finding a sense of scale by putting subjects in your foreground or mid-ground are key.
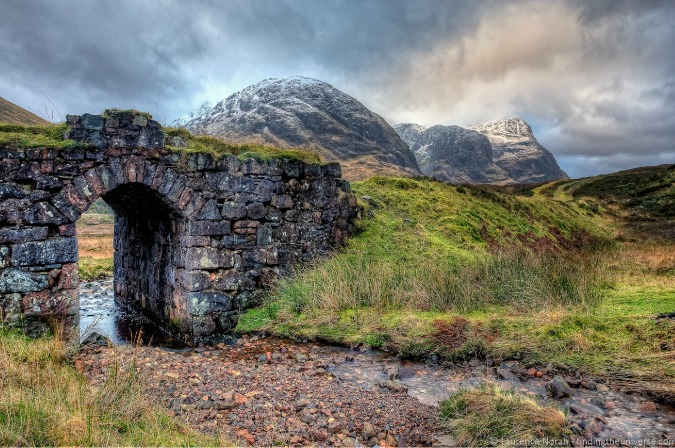
Captivating photograph of a stone wall door and mountain range in rainy Europe

10. Learn How to Use Low light

So often we’re out with friends at night and want to capture those moments together, but we can’t seem to get anything other than a blurry mess.

This is because most cameras aren’t great when working with the amount of light that’s available at night —they use slow shutter speeds that turn movement into blurs.

More expensive equipment can make a real difference for low-light photography. All is not lost if your pockets aren’t deep enough, though. First, you can increase the ISO setting on your camera. While this will reduce the quality of your shots, they will look better than blurry photos.

Another idea is to find something to rest your camera on. If you don’t have a tripod, try and find an alternative — anything that is stationary and not prone to shake like your hand does. Then, use your camera’s timer function to take the shot. If you’re taking pictures of people, get them to stand as still as possible!
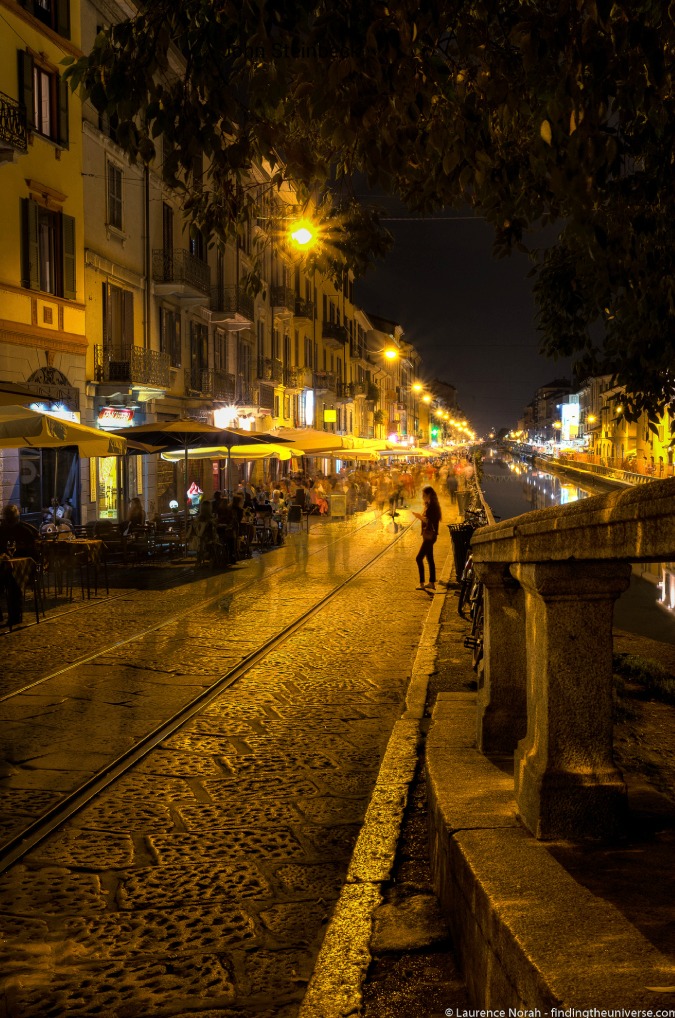
Romantic photo of a nighttime street and canal in Europe

11. Get Action Shots

For better action photos, you have two options. One is to use a fast shutter speed to “freeze” the action — such as a shot of a hummingbird in flight, or a surfer on a wave.

The other option is to show the motion by using a longer shutter speed — the resulting blur will convey a sense of action to your viewer.

In this shot of a train, I manually set the shutter speed to 1/30th of a second, slow enough that the trees at the edge of the shot would seem to be rushing past as I leaned out of the window, yet fast enough that the train itself would remain sharp, even handheld. I think this worked pretty well!
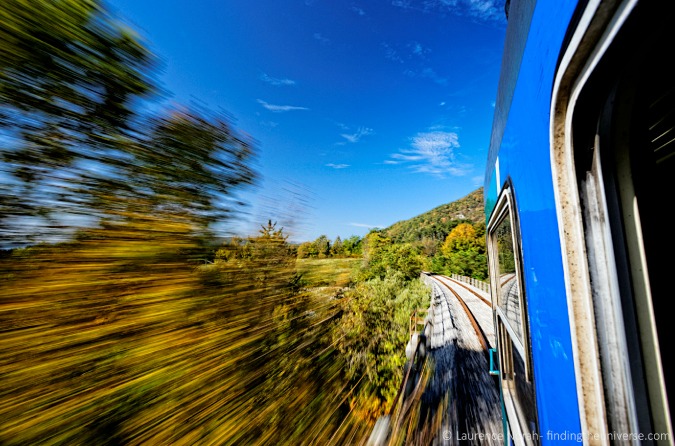
Photo from a fast train passing by a lush landscape

12. Take Pictures of Waterfalls

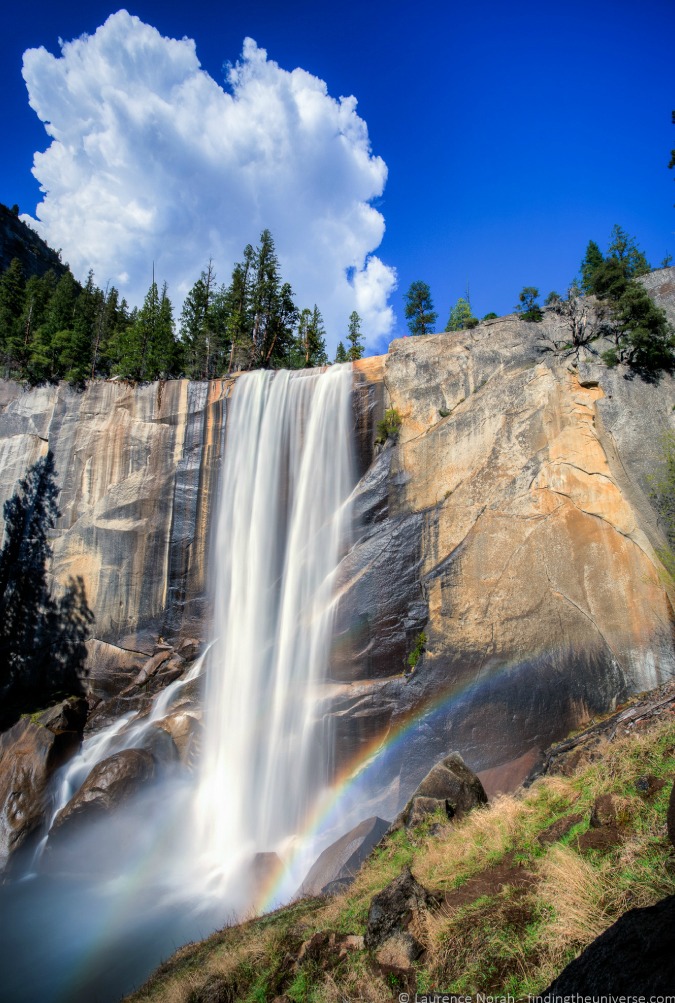
Waterfalls are a fantastic photography subject. My favorite way to shoot them is with a slow shutter speed, creating a soft and fluffy effect. Shutter speeds of 1/15th of a second and slower give the best results — you’ll need to use a tripod or rest your camera on something to avoid blur from your hand movement.

Another good way to shoot waterfalls is from far away using a long lens, using compression to create a sense of drama around your subject. Or, go the other way, and shoot super-wide, taking in the full glory of the scene.

Finally, don’t forget to use the light. All that flowing water can cause beautiful rainbows, as seen in this shot of Vernal Falls in Yosemite:
Breathtaking photo of the Vernal Falls and a rainbow in Yosemite Nation Park, USA

***
I believe that taking better photos is a combination of three factors — being in the right place at the right time, knowing how your gear works, and knowing how to compose a great shot. Shutter speed and aperture are two key settings in the photographer’s toolbox, and you need to learn how to access and control those modes on your camera.

When you do, you will have much greater creative control over your photography.

Laurence started his journey in June 2009 after quitting the corporate life and looking for a change of scenery. His blog, Finding the Universe, catalogs his experiences and is a wonderful resource for photography advice! You can also find him on FacebookInstagram, and Twitter.

Travel Photography: Learn More Tips

For more helpful travel photography tips, be sure to check out the rest of Laurence’s travel photography series:

LEARN TO GET OUT OF AUTO!

capture the world photography courseIf you are looking to really get into photography and want to master your camera and take amazing photos when you travel, Laurence and I have developed a comprehensive photography course that will get you out of auto and have your friends go “Wow! That’s really breathtaking!” in no time. Click here to learn more about it!

Book Your Trip: Logistical Tips and Tricks

Book Your Flight
Find a cheap flight by using Skyscanner or Momondo. They are my two favorite search engines because they search websites and airlines around the globe so you always know no stone is left unturned.

Book Your Accommodation
You can book your hostel with Hostelworld. If you want to stay elsewhere, use Booking.com as they consistently return the cheapest rates for guesthouses and cheap hotels. I use them all the time.

Don’t Forget Travel Insurance
Travel insurance will protect you against illness, injury, theft, and cancellations. It’s comprehensive protection in case anything goes wrong. I never go on a trip without it as I’ve had to use it many times in the past. I’ve been using World Nomads for ten years. My favorite companies that offer the best service and value are:

Looking for the best companies to save money with?
Check out my resource page for the best companies to use when you travel! I list all the ones I use to save money when I travel – and I think will help you too!

The post 12 Ways to Shoot the Perfect Travel Photograph appeared first on Nomadic Matt's Travel Site.
How to Take Professional Travel Photos

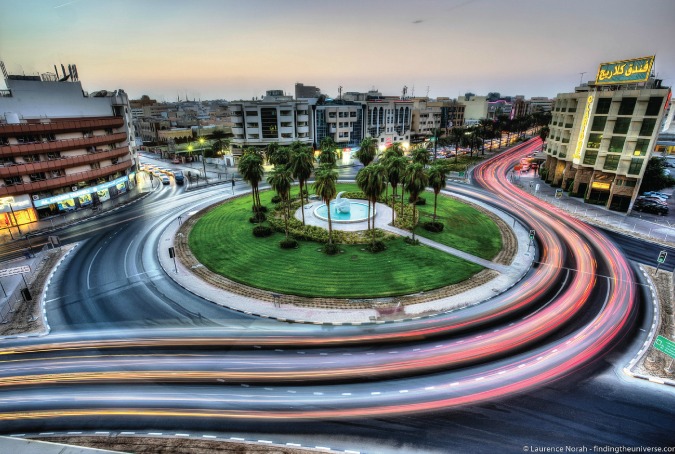
Stunning travel photo of a Dubai roundabout at night
Updated: 12/2/2018 | December 2nd, 2018

Travel photography. It’s not something I’ve very good at. I take all my pictures on an iPhone and, if they aren’t used on the blog, they mostly just sit on my hard drive. I’ve never taken the time to really improve my skills. Like learning a language, improving your photography takes time.

Luckily, just like learning a language, anyone can do it!

Travel photographs are memories. You look at a picture and it conjures up thoughts, feelings, and smells that take you back to a long forgotten place. I think it’s important we all spend a little time improving our travel photography.

Today, professional photographer Laurence Norah of Finding the Universe begins a five-part series on how to become a better photographer and take better travel photos. He’s going to share his top travel photography tips to help you improve your skills and take awesome travel photos.

Enter Laurence…

In 2009, I gave up my job in IT and set off to travel the world. My first destination was Australia, a stunning country where I desperately wanted to capture my adventures. I’d been taking photos since I was 13, but it was only on this trip that I started to focus on learning the art of photography and realized that this was something I could be truly passionate about.

I quickly learned the reality that photography is a skill that takes time, effort, and practice to master.

It’s also not a question of gear — great travel photography is very much about the photographer.

In this post, I’ll give you the 8 simple tavel photography tips you need to take better pictures right away. If you follow these rules, you won’t go wrong!

1. Composition: Taking Pictures People REALLY Want

Patterns: the human brain is a sucker for them. We’re always looking for patterns — be they shapes in the clouds, symmetry in buildings, or colors that compliment each other. There’s just something about a pattern that our brains love.

Understanding these patterns and what pleases the human brain is a nifty shortcut to taking better photos. And that’s what composition in photography is all about. Learn and apply the rules below, and you’ll start taking more photos that people will enjoy.

Before launching into them, though, some important basics. First, ensure that your camera is level. You don’t want wonky horizons. Your brain generally doesn’t like them; they’re the visual equivalent of nails on a chalkboard.

Next — stop moving. You want to be as still as possible when shooting to avoid blurry images. Hold your camera with both hands and be steady, or use a tripod.

2. The Rule of Thirds

One of the most important rules of composition is known as the rule of thirds.

I learned recently that this is based on how babies learn to identify their mothers’ faces, which can be split up into three parts, comprising the eyes, nose, and mouth.

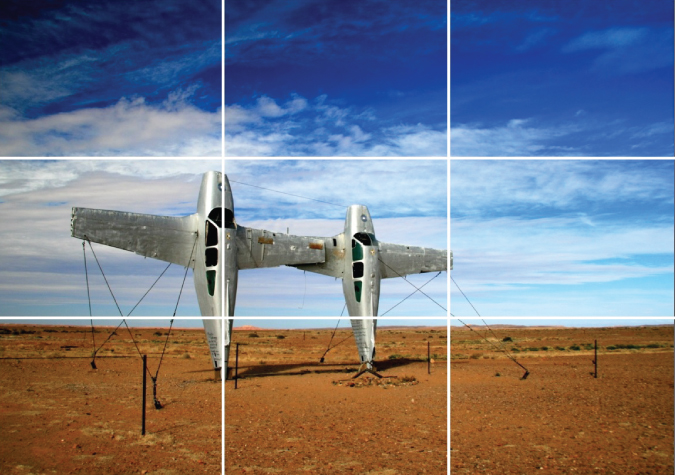
The rule of thirds requires you to break an image into three equal parts either vertically, horizontally or both. The goal is to place key compositional elements into those thirds.

On your device, find the setting to enable a grid over the preview screen. Four lines will appear, two vertical and two horizontal.

Photo of surreal art sculpture park in the Australian Outback

Take a look at my shot above of a surreal sculpture park deep in the Australian outback, over which I have overlaid a grid to demonstrate the horizontal and vertical thirds.

With the grid, you can see how I have composed the image: one-third land and two-thirds sky, while the plane on the left is on the left-hand grid line, close to the intersection of two lines.

Placing subjects on the intersecting points will naturally draw the viewer’s eye to them, as these points are usually where we focus first in an image, and doing so is a great starting point for a good composition.

Another of my favorite subjects to shoot is a sunset. I love how they are always different and how wonderful the light is at that time of day.

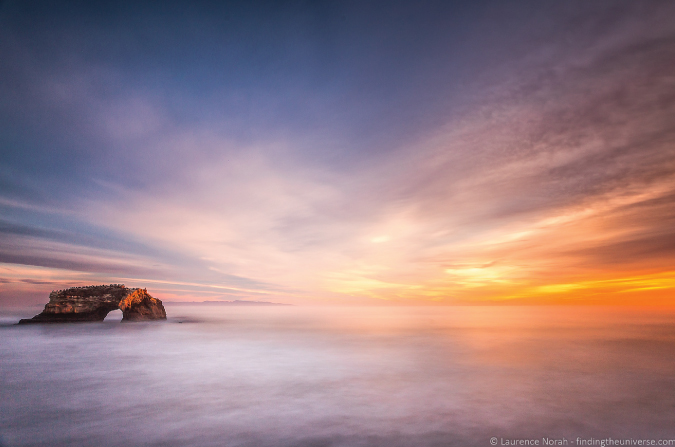
To get a great sunset shot, you can easily apply the rule of thirds — composing the shot with two-thirds sky, and one-third land or sea. You want to avoid splitting the image half and half, as it won’t look as good. The shot below of a sunset in Santa Cruz illustrates this and also has an interesting subject in the left third of the image.

Photo of a beautiful, golden sunset over the ocean in Santa Cruz, California

3. Leading Lines

When composing a photograph, you want to make it as easy as possible for the person looking at it to figure out the subject and focus of the image.

One way to do this is with leading lines — the use of natural geography or other features that the viewer will naturally look at first and which will lead their eyes to the main subject.

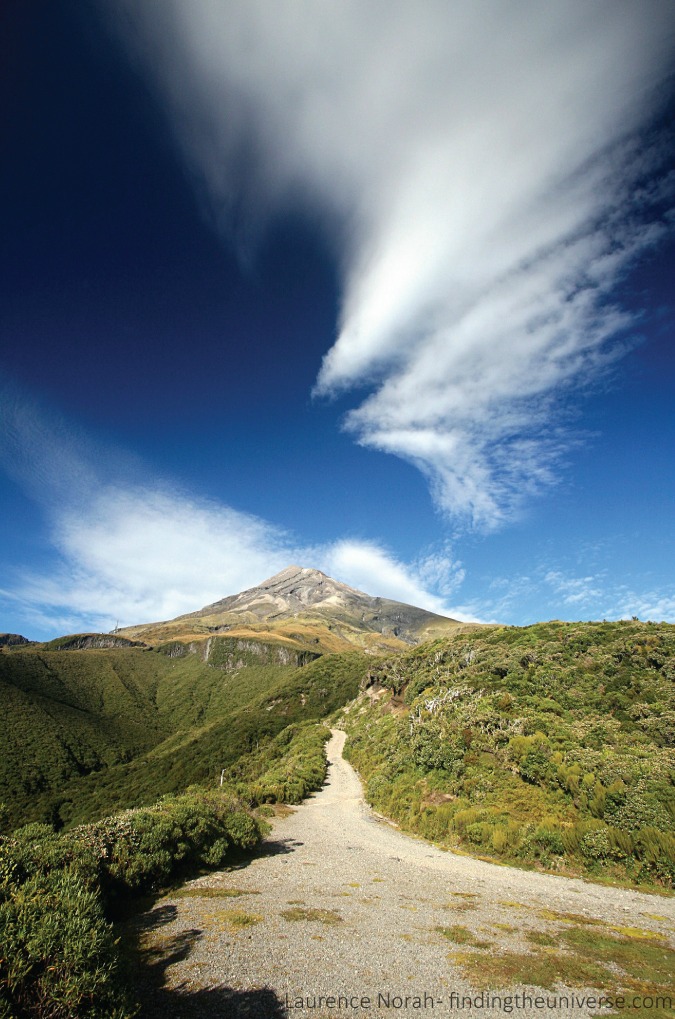
Roads are excellent as leading lines, particularly in big landscape shots. When I was traveling in New Zealand, I wanted to create a photographic story of the hike up Mount Taranaki, one of my favorite New Zealand hikes. Near the start of hike, the walking trail itself gave me a perfect leading line to illustrate the journey ahead, drawing the viewer’s eye into the frame and up to the mountain.

Photo of the walking trail up Mount Taranaki in New Zealand

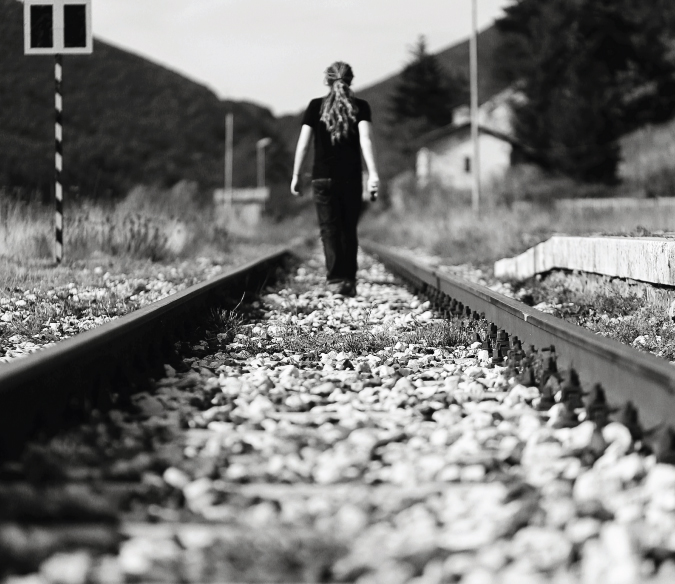
Another good illustration of a leading line is this shot of me walking on railway tracks in Italy. Obviously, it’s only advisable on either disused or somewhat infrequently used tracks!

Black and white self-portrait of Laurence walking on railway tracks

The goal for this image was a self-portrait that evoked my life of travel. The parallel tracks, which appear to converge, were perfect for leading the viewer’s eye to the subject — me. I felt I captured the imagery of wanderlust that I was looking for by using them.

4. Foreground, Midground, and Background

Have you ever taken a picture of a mountain or city skyline and then looked at it later and wondered why it doesn’t manage to convey the majesty of what you were looking at?

This is likely because your photograph is a two-dimensional image and you have lost the sense of scale that is apparent when you are present and in the moment.

When composing a shot — and this is particularly true for landscape photography — think about the different elements in the foreground, midground, and background of the shot.

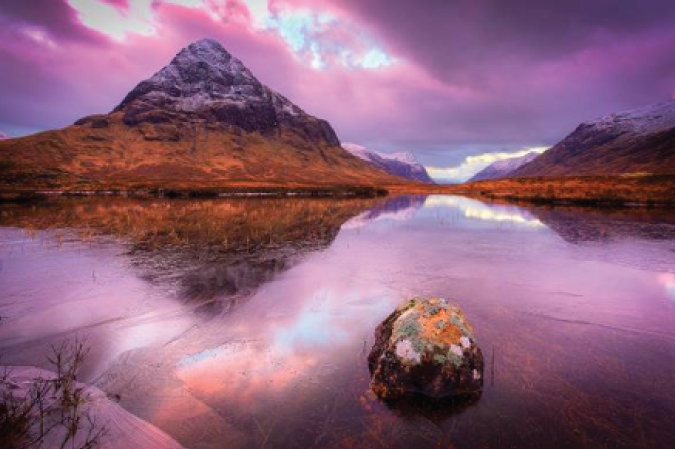
Here’s an example of a sunset in Glencoe, Scotland, easily the most stunning place I’ve photographed in 2015.

Breath-taking sunset photo over a frozen lake in Glencoe, Scotland

I used the rock in this frozen lake to provide something interesting in the foreground, helping to provide scale and balance to the overall image. The viewer’s eye is drawn to the rock, and then likely to the mountain and sunset, before heading into the distance of the valley.

When you are out and about in the world, think about everything around you. If you see a far-off mountain you want to shoot, look around and see if you can find something interesting in the foreground or midground to incorporate into the shot. If you’re near a river, maybe that could be a canoe. Elsewhere it could be a house. Or a group of sheep. Or a car starting to scale a winding road.

If you’re shooting a city scene, look at what is happening all around you. Street vendors, different modes of transport, and signs and storefronts can all be incorporated as foreground to provide context and scale for your city skyline or that interestingly shaped building.

If you can’t find something, be creative. Find someone to stand in your shot to provide that scale. If you’re travelling with a tripod, do what I did in that railway shot and use yourself as the subject. Just remember not to confuse your viewer too much with too many compositional elements, and keep it clear what the photo is of.

Thinking beyond the big background parts of the image and focusing on the smaller elements will help you create more balanced, pleasing images.

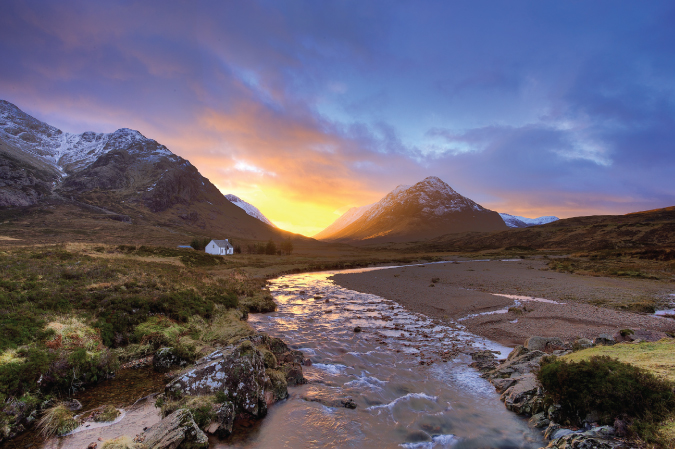
Photo of the sunsetting behind mountains in Glencoe, Scotland with a house in the midground

Another shot from Glencoe. Here the house provides that midground scale, while the river works both as an interesting foreground subject and as a leading line to draw you into the photograph.

5. Framing

This compositional technique isn’t about hanging a picture in a frame; it’s about using what’s around you to “frame” the subject you are trying to capture, illustrating to the viewer what the shot is of and drawing their eyes into the scene.

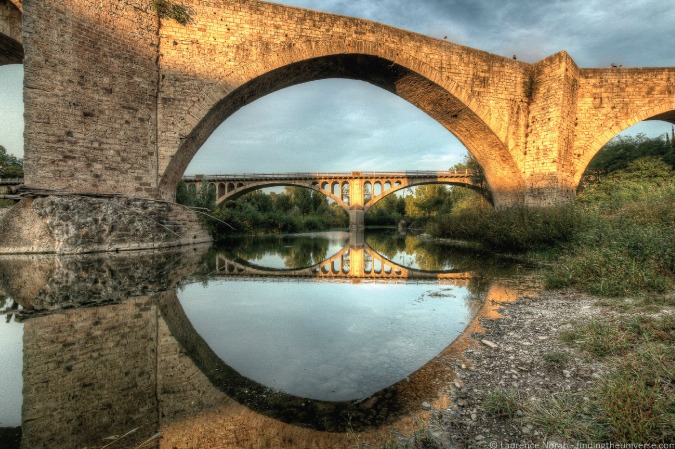
Photo of old bridges in the Medieval town of Besalú, Spain

In this shot of the bridge into the medieval town of Besalú in Spain, I used the old bridge and its reflection as a natural frame for the newer bridge.

When you have found your subject, look around to see if there’s a way you can frame it creatively. Some good options for framing include vegetation, like tree branches and trees, as well as doors and windows.

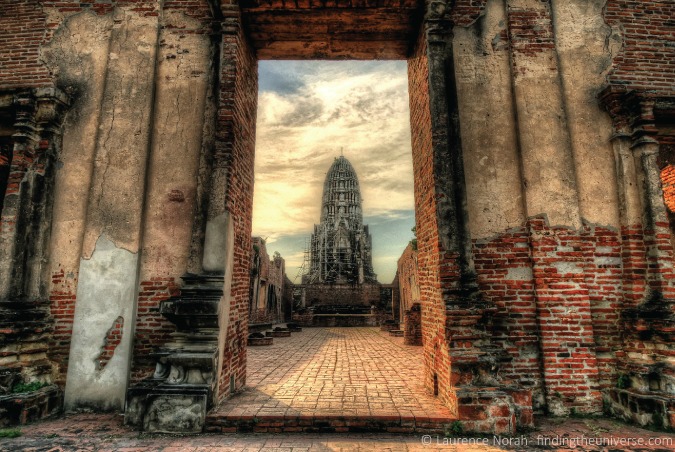
Take a look at this shot of a temple in Ayutthaya, Thailand, to see what I mean. I wanted to capture the beauty of this temple scene while drawing the viewer into the wat in the center.

Photo of beautiful, old temple in Ayutthaya, Thailand

The frame in this case is much larger than the subject, but it is never unclear what the shot is of. This is a really easy photography technique, but it might require you to scout around, or step back from your subject, to find a good way to frame it. Don’t be afraid to stand further away and use the zoom on your lens to get the frame you want.

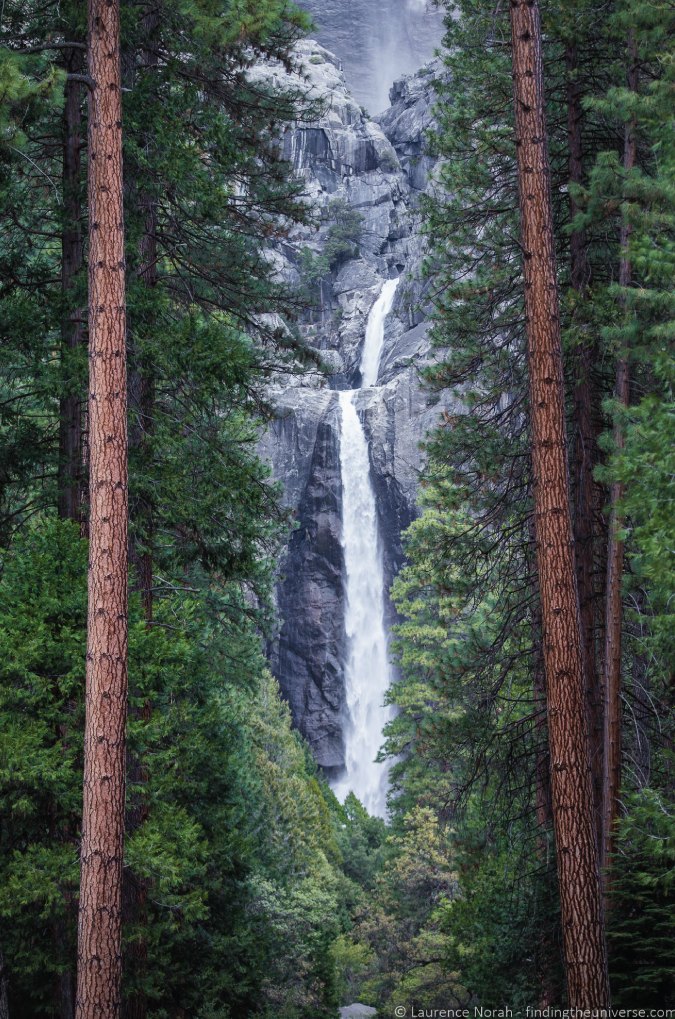
As another example, using trees to frame a waterfall, here’s a shot of Lower Yosemite Falls in Yosemite National Park.

Photo of Lower Yosemite Falls between the trees in Yosemite National Park

I felt that the trees added much more to the shot with the waterfall between them. There was a pleasing symmetry to the shot with the two parallel trees.

There are many more options for framing. Experiment and see what works!

6. Focal Points

One way to be sure that people look at the part of the image you want them to look at is to have only that part of the image sharp and in focus and the rest blurry.

This is particularly effective for isolating people or animals in shots — take a look at wedding or sports photos of people, and you’ll see how often the subject of the shot is the only thing in focus.

I love shooting events with friends and family, and I find that this technique works really well at isolating the subject from a crowd and making it obvious who the photo is of.

Photo of a woman having at a party with friends

To start with, you can achieve this effect with the “portrait” or “people” mode on your camera. You can see some more examples of subject isolation through focus here.

7. Use of Color

Color is really important in photography, particularly how different colors work well together. For example, blue works well with yellow (sunflowers in a field), and red works well with green (Christmas!).

To figure out which colors work well together, take a look at this color wheel.

Generally, colors opposite each other on the wheel will complement each other. These colors don’t need to be evenly balanced in a shot — often images work best with a small percentage of one and a greater percentage of another.

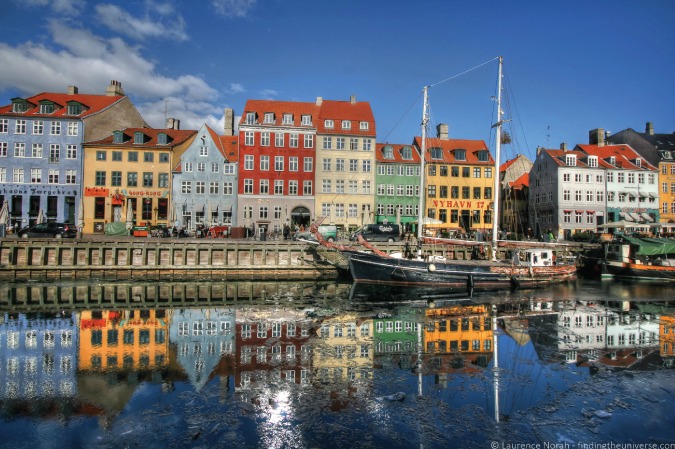
Photo of houses reflecting on the Nyhavn Harbor in Copenhagen, Denmark

Take a look at the shot above, from Copenhagen’s gorgeous Nyhavn Harbor. You can see all sorts of colors, but in particular, the blue of the sky and water is the predominant color, with the houses’ reds and yellows (yellow is opposite blue on the color wheel) offering a counterpoint.

When you are on your travels, keep an eye out for contrasting and complimentary colors that you can incorporate into your shots. Spice markets, old European cities, rural meadows, and old colorful barns in green fields are a great place to start.

8. Storytelling

Remember that when you are taking a picture, you have all the background and surrounding knowledge of your trip in your mind. When you look at the image later, all of that will come back to you.

No one else has that advantage. To them, that shot of a waterfall is just that — a shot of a waterfall. The story of the five-hour hike there through a leech-infested jungle? Lost. The feeling of how refreshing it was on your skin when you took the plunge in to cool off? Also gone. It’s just a two-dimensional image on a screen, likely quickly flicked by to be replaced by the next image in the stream.

It’s your job to bring all that lost context to life.

We’re often told that a photograph is worth a thousand words. As a photographer, it’s your job to convey those words. Figure out how to tell that story with your image. Get the shots that pull your viewers into your stories. Use emotion, find and freeze moments, and incorporate the human element so your shots resonate with your viewers.

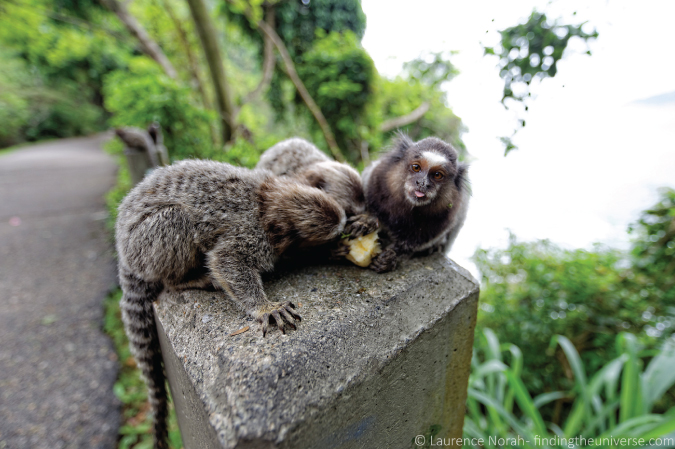
Take this monkey in Rio de Janeiro. These guys were being really cheeky with tourists, trying to get food from them and generally playing around as much as possible. I wanted to try and capture some of that, and I managed to get this monkey sticking its tongue out at me.

Photo of cheeky Monkey in Rio de Janeiro, Brazil

I’d advise spending time thinking about the shot you are trying to create, the moment you are trying to capture, and the story you are trying to tell your viewer. Put yourself into their shoes, imagine you are going to be looking at the shot with no other context, and try to build the shot from there.

This is probably one of the harder parts of photography, and — like the shot of the monkeys above — will likely require some time, patience, and luck. You will make errors. But with research and practice, you will be able to master it!

***

Practice makes perfect – and travel photography is no different in this regard! The more photos you take, the more you will learn how to compose and capture great shots. While reading some travel photography tips will definitely help, the key is to actually go out in the world and practice them. The more you practice, the faster this will all become second nature. It won’t happen overnight, but over time your skills will improve — I promise!

So what are you waiting for? Get out there and start taking some photos!

Laurence started his journey in June 2009 after quitting the corporate life and looking for a change of scenery. His blog, Finding the Universe, catalogs his experiences and is a wonderful resource for photography advice! You can also find him on FacebookInstagram, and Twitter.

Travel Photography: Continue The Series

For more helpful travel photography tips, be sure to check out the rest of Laurence’s travel photography series:

LEARN TO GET OUT OF AUTO!

capture the world photography courseIf you are looking to really get into photography and want to master your camera and take amazing photos when you travel, Laurence and I have developed a comprehensive photography course that will get you out of auto and have your friends go “Wow! That’s really breathtaking!” in no time. Click here to learn more about the course and start today!

Book Your Trip: Logistical Tips and Tricks

Book Your Flight
Find a cheap flight by using Skyscanner or Momondo. They are my two favorite search engines because they search websites and airlines around the globe so you always know no stone is left unturned.

Book Your Accommodation
You can book your hostel with Hostelworld. If you want to stay elsewhere, use Booking.com as they consistently return the cheapest rates for guesthouses and cheap hotels. I use them all the time.

Don’t Forget Travel Insurance
Travel insurance will protect you against illness, injury, theft, and cancellations. It’s comprehensive protection in case anything goes wrong. I never go on a trip without it as I’ve had to use it many times in the past. I’ve been using World Nomads for ten years. My favorite companies that offer the best service and value are:

Looking for the best companies to save money with?
Check out my resource page for the best companies to use when you travel! I list all the ones I use to save money when I travel – and I think will help you too!

The post How to Take Professional Travel Photos appeared first on Nomadic Matt's Travel Site.
Changing My Tune: How I Learned to Love L.A.

Los Angeles crosswalk
Posted: 11/29/18 | November 29th, 2018

Maybe it was the traffic. Maybe the smog. Maybe it was the apparent vanity of everyone I met. Or the hippie-dippie way of life (I’ve seen people pick meals by using a crystals). I know it was definitely in part the lack of public transportation.

While I could never really put my finger on it, there was just something about Los Angeles that just always rubbed me the wrong way.

I’d go to see friends or attend conferences and, while I enjoyed that fun, I hated the city itself.

Whenever I had to go visit, I’d just think to myself “Ugh, another trip to L.A.!”

I just never got the city.

After each visit, I always felt that if I never returned, I wouldn’t be missing anything.

Heck, I even wrote a blog post about my disdain for LA!

And then one day while I was visiting, I woke up and I really liked — nay, LOVED — Los Angeles.

I don’t know when it happened.

I can’t pinpoint one precise moment or event.

After all, my routine in LA has always been the same: see a few attractions, eat and drink lots, catch up with friends, maybe head to the beach, some work at WeWork, and host a meet-up.

But, one day, I just woke up, looked around, and said, “Ya know, I really like it here. I think I’ll extend my stay a bit longer.”

The more I visited, the more interesting places I discovered or was taken to, the more offbeat sights I saw, and the more I got to know the city. I learned its history. I learned how to get around, when to brave the traffic and when not to. I found markets and hole-in-the-wall taquerias and noodle shops. I had too many martinis at the historic Musso & Frank’s.

And then, when I was there last week, it hit me.

I realized I hated LA for the same reason I originally hated Bangkok.

And now love LA for the same reasons I fell in love with Bangkok.

Los Angeles isn’t built for tourists.

Yes, tourists go there. Yes, there are a lot of touristy things to do there.

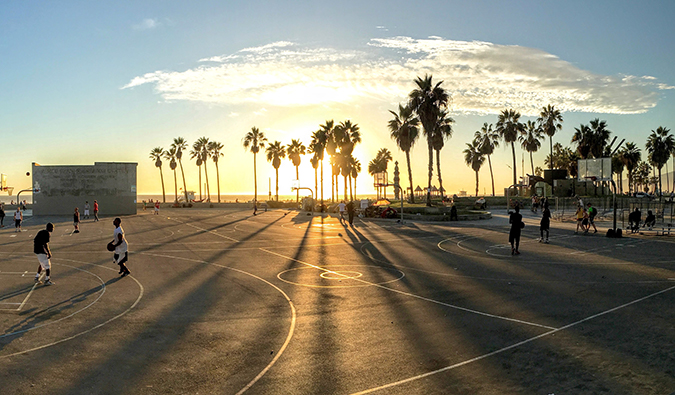
people playing basketball in Los Angeles

But it’s not like Hong Kong, Paris, Buenos Aires, London, Sydney, or other places where you can go down a long list of attractions, drink in the culture, get around easily, and get a feel for the city in a short period of time.

No, the sprawling nature of Los Angeles, the traffic and cost of getting around, the lack of a city center, and the transient nature of its inhabitants makes it a bad “tourist” city.

To get to know Los Angeles, you have to live there. Just like Bangkok.

Like Bangkok, L.A. is requires you to stay awhile. It’s an onion with layers you need to peel back over time.

L.A. is found in the restaurants, markets, ethnic enclaves, offbeat bars, and coffee shops. It is found on hiking trails and beaches. In art and music shows.

It’s found in the vibe and the people, not in the sights.

I began to love Bangkok when I got know it beyond the temples and the tourist trail. When I found hidden markets and amazing street stalls frequented only by locals, became friends with residents, and understood how it operated, I knew why people loved Bangkok so much.

Bangkok is not a city for tourists.

It’s for residents.

Just like Los Angeles.

When I realized that, I stopped looking at Los Angeles through the lens of a tourist. When I began to look at through the eyes of the people who lived there, suddenly the city becomes alive with things to do, coffeeshops to sit in, and places to explore.

It turns out L.A. is an awesome city if you know where to look.

I just never knew where to look before.

Book Your Trip to Los Angeles: Logistical Tips and Tricks

Book Your Flight
Find a cheap flight by using Skyscanner or Momondo. They are my two favorite search engines because they search websites and airlines around the globe so you always know no stone is left unturned.

Book Your Accommodation
You can book your hostel with Hostelworld. If you want to stay somewhere other than a hostel, use Booking.com as they consistently return the cheapest rates for guesthouses and cheap hotels. I use them all the time. Here are suggested places to stay in Los Angeles:

  • USA Hostels – Located right between Hollywood Boulevard and Sunset Strip, this spot is awesome with privacy pods and ensuite dorms.
  • HI Los Angeles Santa Monica – A comfortable hostel where all the beach action is in Santa Monica.
  • Banana Bungalow – A social hostel in Hollywood with a great outdoor courtyard area (and regular BBQs!).

Don’t Forget Travel Insurance
Travel insurance will protect you against illness, injury, theft, and cancellations. It’s comprehensive protection in case anything goes wrong. I never go on a trip without it as I’ve had to use it many times in the past. I’ve been using World Nomads for ten years. My favorite companies that offer the best service and value are:

Looking for the best companies to save money with?
Check out my resource page for the best companies to use when you travel! I list all the ones I use to save money when I travel – and I think will help you too!

Looking for more information on visiting Los Angeles?
Check out my in-depth destination guide to LA with more tips on what to see, do, costs, ways to save, and much, much more!

The post Changing My Tune: How I Learned to Love L.A. appeared first on Nomadic Matt's Travel Site.
My Top 11 Hostels in Stockholm

Stockholm
Posted: 11/30/2018 | November 30th, 2018

Stockholm is one of my favorite places in Europe. In my opinion, it’s one of the prettiest cities on the continent with historic well-preserved buildings dating back hundreds of years (that medieval center!), lots of parks and green space, and cobblestone streets all set on a beautiful archipelago.

However, it’s not a cheap place to visit. Even the hostels here ten to be expensive – and they are often small and cramped. I’ve been coming here a long, long time (I used to lead tours to Stockholm and lived here for a summer) and have stayed in every hostel in the city.

(For a small city, there are a surprisingly a lot of places to stay and, since I come here often, I wanted to try them all out?)

Most hostels in Stockholm here are OK. There are few ones that are terrible beyond measure.

But this city has a lot of incredible hostels in Stockholm!

So which are they?

Without further ado, here are the…..

11 Best Hostels in Stockholm

(In no particular order.)

1. Interhostel

Interhostel, Stockholm
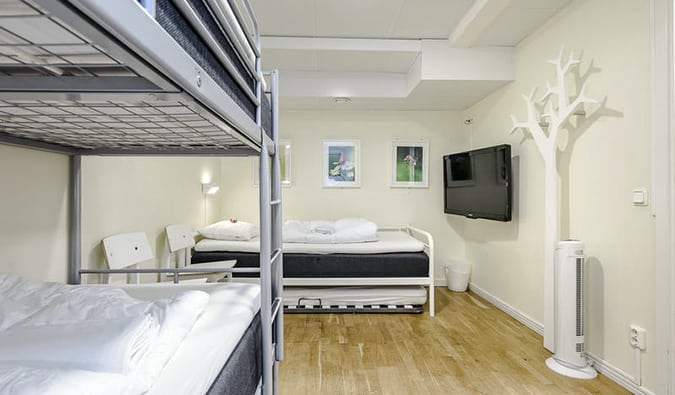
Interhostel might not be the best hostel in town (in fact, it’s one of the worst) but it’s the cheapest in town. If money is your primary concern, you should stay here. Some of the dorm rooms (as well as the kitchen) are small and feel cramped (the larger dorms have up to 14 beds), but the staff is friendly and the hostel is centrally located. Plus, it’s always busy with people so it’s one of the best places to meet other travelers! For that reason, it makes the list!

Beds from 160 SEK/18 SEK, single rooms from 490 SEK/55 USD.

—-> Click here to book your stay at Interhostel!

2. Archipelago Hostel Old Town

Archipelago Old Town, Stockholm
Archipelago Hostel is one of the nicer hostels in the Old Town, conveniently located in a 17th-century building that’s right near the train line. It’s also near the Nobel Museum, the Royal Palace, and the Cathedral. This hostel is very small, with only a few rooms and a small common area, but I recommend staying here if you’re looking for some peace and quiet. The shower pressure here is super strong too (just be aware that the shower stalls, while private, are in a co-ed bathroom).

Beds from 160 SEK/18 USD, doubles from 495 SEK/55 USD.

—-> Click here to book your stay at Archipelago Hostel Old Town!

3. Generator Stockholm

Generator Hostel, Stockholm
Generator is one of the biggest European hostel chains, and this is one of its best properties. The furniture is modern, Nordic and very minimalist! There’s a huge common lounge on the ground floor with a restaurant and bar too. There’s a laundry facility onsite too. It’s location near the train station makes it an ideal spot to explore nearby attractions, museums, and nightlife. While it is the nicest hostel around (it was only recently built), it’s so big that it often feels impersonal and more like a backpacker hotel than anything else. If you want a more “luxury” hostel or something a “cheap” hotel, stay here. If you want a small, social, traditional backpacker place, stay elsewhere. Check their website for deals as they often have them!

Beds from 165 SEK/18 USD, doubles from 1,135 SEK/125 USD.

—-> Click here to book your stay at Generator Stockholm!

4. City Backpackers

City Backpackers, Stockholm
This is my favorite place to stay and by far the best hostel in Stockholm. It has a lovely café that offers steep discounts to hostelers and an outdoor eating/sitting area. Its mattresses and pillows are super cozy, and there is a huge kitchen, many common rooms, a free sauna, free pasta, and laundry facilities. You can’t turn a corner without bumping into a public computer, either! It also hosts affordable events, including bike tours, meatball-making classes, pub crawls, and more. This is a very popular hostel, so book in advance!

Beds from 190 SEK/20 USD, double rooms from 650 SEK/72 USD.

—-> Click here to book your stay at City Backpackers!

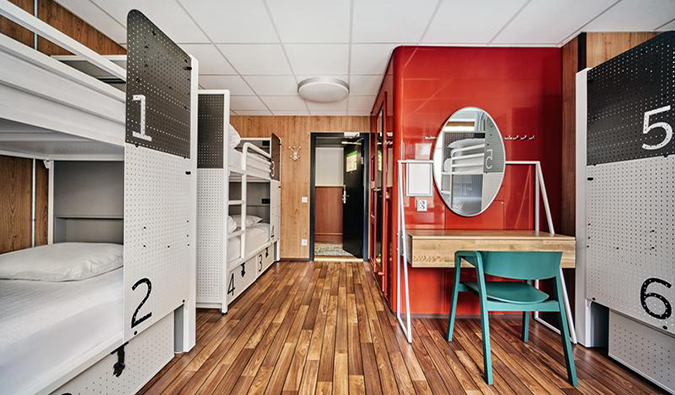
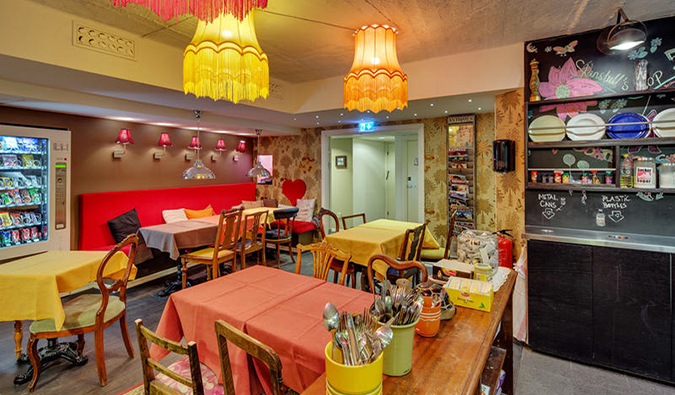
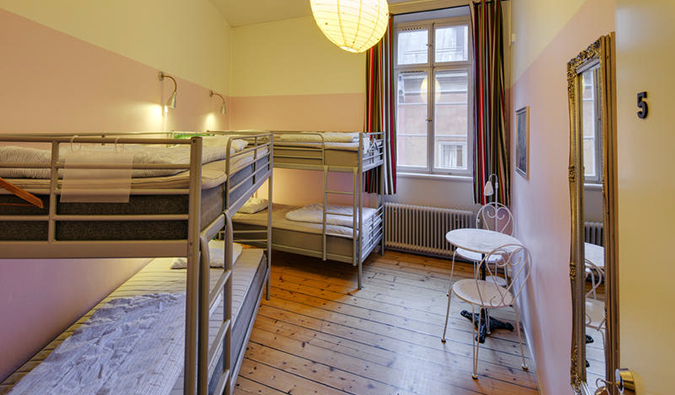
5. Skanstull Stockholm

Skanstull Hostel, Stockholm
My second favorite hostel in Stockholm, this place was remodeled a few years back and has a brand-new, larger kitchen and common area, and the kitchen is one of the nicest I’ve seen in a hostel in a long, long time. The hostel is quite small but that provides a close-knit setting for getting to know other travelers. It’s located in the southern part of the city in Soddermalm (my favorite area of Stockholm).

Beds from 200 SEK/22 USD, double rooms from 775 SEK/85 USD.

—-> Click here to book your stay at Skanstull Stockholm!

6. Castanea Old Town Hostel

Castanea Old Town Hostel, Stockholm
This amazingly central hostel is quiet and clean, and the staff is friendly. The rooms are bright and airy, with large windows and high ceilings. If you don’t want to make your own breakfast there’s a fantastic small bakery just around the corner. I love the narrow cobblestone street it’s located on! It’s cute, cozy, and relaxing.

Beds from 205 SEK/23 USD, double rooms from 690 SEK/76 USD.

—-> Click here to book your stay at Castanea Old Town Hostel!

7. City Hostel – Central Station

City Hostel, Stockholm
The hostel is a 20-minute walk to the Old Town, but it’s the closest to Central Station. The rooms are pretty basic and nothing to write home about. The common area and bathrooms are kept super clean. There’s a great kitchen here too. Overall, this is a pretty average hostel but if you’re looking for something inexpensive and near the train station, I would stay here!

Beds from 240 SEK/26 EUR, double rooms from 495 SEK/55 USD.

—-> Click here to book your stay at City Hostel – Central Station!

8. Langholmens Vandrarhem

Langholmens Vandrarhem, Stockholm
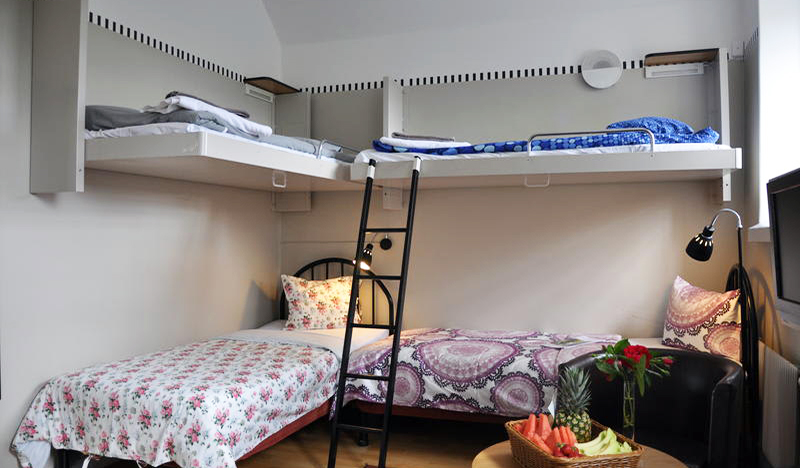
This is the best family / group hostels in Stockholm. It’s set inside an old prison, and most rooms have their own shower and toilet. It has free Wi-Fi, a cafeteria, a pub, a restaurant, a laundry room, and bike rentals. Linens are NOT included in the price (nor is breakfast), but they are available for an additional cost. The hostel is located on Långholmen island, surrounded by nature. It opens right onto a beach where you can take a swim in Lake Mälaren during the summer months! HI hostel members receive a discount.

Beds from 250 SEK/28 USD.

—-> Click here to book your stay at Langholmens Vandrarhem!

9. 2Kronor Hostel Vasastan

2Kronor Hostel Vasatan, Stockholm
This hostel is in charming house that was built in 1865. It’s quiet here as 2Kroner is located in the north of the city, in a nice neighborhood (Vasastan) full of shops, cafes, and restaurants. This place is really good if you want something more upscale, smaller, and a bit queiter than some of the more centrally located party hostels.

Beds from 280 SEK/31 USD, doubles from 745 SEK/82 USD.

—-> Click here to book your stay at 2Kronor Hostel Vasastan!

10. The Red Boat Mälaren

Red Boat Hostel, Stockholm
If you’re looking for a unique place to stay, this cozy hostel is actually on two boats on Lake Mälaren, and there’s a sea-themed bar in reception. There’s no kitchen here, but you’re just a five-minute walk to the Old Town. The rooms and bathrooms are small (it’s a boat!) but it’s one of the coolest places to stay, especially in the summer.

Beds from 310 SEK/34 USD, doubles from 520 SEK/57 USD.

—-> Click here to book your stay at The Red Boat Mälaren!

11. Jumbo Stay STF/IYHF

Jumbo Stay, Stockholm
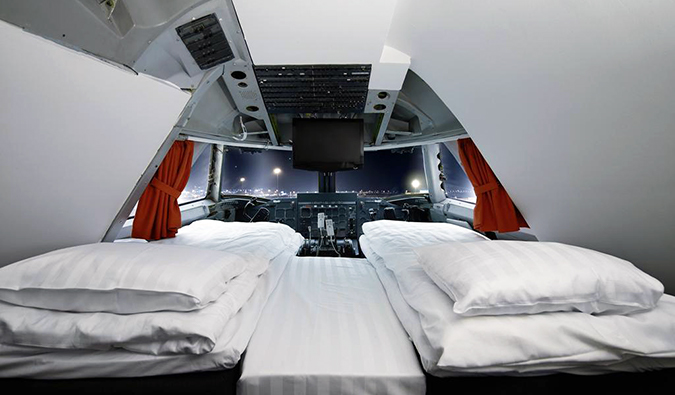
This hostel is actually an old converted 747 plane and the best place to stay if you have to be at the airport really early. There are singles, doubles, and 2–4-bed dorms. The best room is the cockpit suite with a private bathroom (starting at 1,850 SEK). It’s open 24 hours a day and has an onsite restaurant and bar. Towels and linens are included. If you’re staying at the airport, stay here. It’s super awesome.

Beds from 450 SEK/50 USD, double rooms from 1,200 SEK/132 USD.

—-> Click here to book your stay at Jumbo Stay STF/IYHF!

***

Stockholm is easily walkable and with a great metro so no matter where you are, it’s easy to get around to amazing green spaces, islands, nightlife, and historic areas. Every hostel in Stockholm has their own vibe but if you’re looking for the best hostels in Stockholm, these hostels are it (remember City Backpackers is the best). You’ll have a great stay, comfy bed, and social environment! What more do you really need?

Get the In-Depth Budget Guide to Stockholm!

Nomadic Matt's Guide to StockholmFor more in-depth coverage of Stockholm, my 80-page guidebook is perfect for budget travelers like you! It cuts out the fluff found in other guides and gets straight to the practical information you need to travel and save money in one of the most beautiful cities in the world. You’ll find suggested itineraries, budgets, ways to save money, on- and off-the-beaten-path things to see and do, nontouristy restaurants, markets, and bars, and much more! Click here to learn more and get started.

Book Your Trip to Stockholm: Logistical Tips and Tricks

Book Your Flight
Find a cheap flight by using Skyscanner or Momondo. They are my two favorite search engines because they search websites and airlines around the globe so you always know no stone is left unturned.

Book Your Accommodation
You can book your hostel with Hostelworld. If you want to stay somewhere other than a hostel, use Booking.com as they consistently return the cheapest rates for guesthouses and cheap hotels. I use them all the time. They’re my favorite website!

Don’t Forget Travel Insurance
Travel insurance will protect you against illness, injury, theft, and cancellations. It’s comprehensive protection in case anything goes wrong. I never go on a trip without it as I’ve had to use it many times in the past. I’ve been using World Nomads for ten years. My favorite companies that offer the best service and value are:

Looking for the best companies to save money with?
Check out my resource page for the best companies to use when you travel! I list all the ones I use to save money when I travel – and I think will help you too!

Looking for more information on visiting Stockholm?
Check out my in-depth destination guide to Stockholm with more tips on what to see, do, costs, ways to save, and much, much more!

Photo credits: 2, 3, 4, 5, 6, 7, 8, 9, 11, 12

The post My Top 11 Hostels in Stockholm appeared first on Nomadic Matt's Travel Site.
Top Ten Places to Go for New Year’s Eve

fireworks in singapore on new years eve
Updated: 11/20/2018 | November 20th, 2018

New Year’s Eve is the biggest party of the year. It’s a celebration that brings people together to celebrate all the potential that a new year offers. It’s a day of hope and celebration.

And it’s not too far away either!

Soon, people from around the world will be ringing in the new year soon with fireworks, festivals, friends, parties, and songs. It’s a fun holiday that knows no nationality.

If you’re ready to stay up past your bedtime and indulge in the revelry, here are my top ten best places to go for New Year’s Eve in 2018:

1. New York City

New York times square on New Year's eve
Times Square has been a focal point of New Year’s activity for more than a hundred years. Around one million people will crowd into the square to watch the famous ball drop. On top of that, around a BILLION more people will watch from home, making this one of the biggest events of the year — every year!

If you want to watch the ball drop in person, be sure to arrive early (people start gathering in the afternoon to get a good spot) and dress warmly! However, there are lots of parties throughout the city and most New Yorkers try to aim for some of the downtown clubs and bars or a house party!

Check out my free travel guide to New York City for more information on how to get there, save money, and enjoy the city during your visit!

2. Sydney

https://www.flickr.com/photos/12333120@N00/3679125507
Australia is one of the first countries in the world to experience New Year’s Eve making Sydney the first major city in the world to greet a new year (sorry New Zealand, you aren’t as big!).  The city hosts one of the largest firework displays in the world. They last almost a full fifteen minutes and are best viewed from one of the boats in the harbor or surrounding hills. After the display, the celebrations usually last until dawn. Locals love enjoying this day as it’s also in the middle of their summer so the weather is always great! Unsurprisingly, accommodation disappears fast so be sure to book well in advance if you want to spend the New Year down under!

Check out my free travel guide to Sydney for more information on how to get there, save money, and enjoy the city when you visit!

3. London

London Eye in London at night
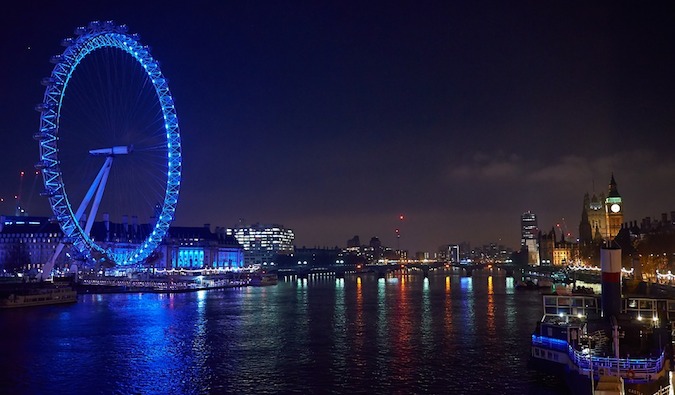
London rings in the new year with an astonishing fireworks display that’s launched from the London Eye. The fireworks can be seen from rooftops and balconies all across London, so you don’t need to leave your hotel to get a good view. If you want to get out there and really experience the display, the best views are from Westminster Bridge and the north embankment of the River Thames (opposite the London Eye).

Check out my free travel guide to London for more information on what to see and do in London when you visit during the holiday!

4. Paris

Champs-Elysees in Paris at night
Paris is the perfect destination for a romantic New Year’s Eve getaway. It has high class dining, clubbing, fantastic fireworks, and the chance to sip Champagne on the Champs-Elysees. Around midnight, you can watch the Eiffel Tower’s light show. Another great place to spend the evening is Montmartre, as it offers spectacular views of the entire Paris skyline.

While you won’t get the same level of epic fireworks as you would in Sydney, there are still great parties through the city and many people light off their own fireworks from the Champs-Elysees. The city stays open late!

Check out my travel guide to Paris for more information on spending New Year’s in Paris! It includes things to do, see, costs, and how to get around! 

5. Ko Phangan, Thailand

Sunset in Thailand
Over 20,000 young people cram on Haat Rin beach in Thailand to celebrate the New Year. Backpackers and travelers from around the world dance, paint themselves up, and drink buckets of alcohol from dusk until the first dawn of the new year. They fill the beach and it’s one of the wildest outdoor parties there is on New Year’s.

If you’re looking to start the new year on a beach and plan to be in Southeast Asia, this is one of the best and most fun places to be. I’ve spent three New Year’s here and loved every single one!

Check out my travel guide to Ko Phangan for more information including information on the famous Full Moon Party.

6. Kiribati

A view of Kiribati
What better way to ring in the New Year than to be the first person to do it? This spot in the Pacific is officially the first place in the world to see the New Year. It’s like going into the future! Tourism here has picked up in recent years as the locals have tried to capitalize on that interesting fact but the island remains mostly an untouched getaway. There’s not much to do here and accommodation isn’t by any means luxurious but what better way to spend the new year than on an island in the South Pacific? Be sure to plan this well in advance as few flights go here and limited accommodation makes its difficult to find spots.

7. Tokyo

tokyo at night
If a single night of partying isn’t enough for you, head to Tokyo. The capital city of Japan starts celebrating on the 29th of December, giving you a few extra days to let loose and give the year a proper send-off. Not only do they start early, but the party almost doesn’t stop. New Year’s celebrations here continue until January 4th. While most of the major tourist sites in the city are closed during this time, the streets of Tokyo (as well as all restaurants and clubs) are packed with locals and visitors alike. The city offers up numerous fireworks displays, dancing, and all the karaoke you can sing!

Check out my travel guide to Tokyo for more information on what to do, see, and ways to save money.

8. Las Vegas

Las Vegas during New Year's
The city that parties every night throughout the year certainly knows how to throw a New Year’s Eve bash to remember. There are so many clubs, hotels, bars, and casinos to choose from in Las Vegas, Nevada, that it’s almost impossible to not celebrate in style. Outdoors, “The Strip” is closed to traffic so everyone can watch the grand fireworks displays high above the city’s neon lights. If you want to wade through the crowds, make your way downtown to Fremont Street and join the massive block party, complete with confetti, a massive wine toast, concerts by big-name rockers, and a five-block-long illuminated canopy 90 feet overhead, on which state-of-the-art sound and light shows are shown.

Check out my travel guide to Las Vegas for more information on enjoying life in Sin City without spending a sinful amount of money.

9. San Juan Del Sur

A beach on San Juan Del Sur
This holiday hotspot in Central America is a surfing and beach mecca for travelers of all ages and styles. During New Years, the city is bursting with tourists and locals who come from the surrounding area to enjoy time on the beach, with their families, and party hard (Nicaraguans sure know how to have fun!). This is definitely a place to go if you’re looking to get bit crazy and then nurse your hangover on the beach the next day. There’s usually a giant beach party where locals and tourists mingle, dance, drink, and countdown a new year together!

10. Edinburgh

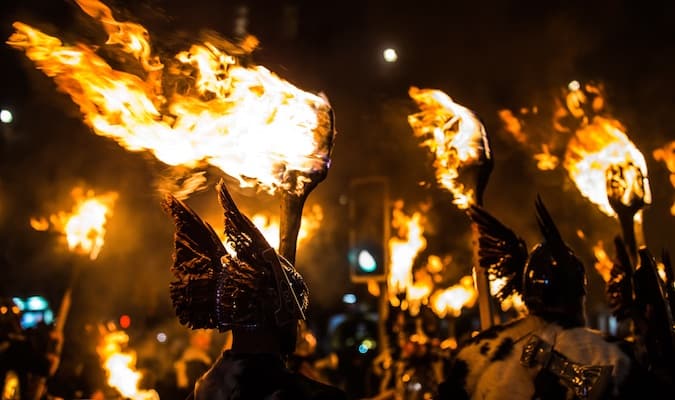
The torchlight procession led by vikings in Scotland
When it comes to New Year’s Eve celebrations, Edinburgh is one of those places that can’t be beat. Their Hogmanay is one of the most fun parties I’ve ever been too. Each year, over 100,000 people take part in the two-day celebration that involves a Viking procession, fireworks over the castle, bonfires, concerts, and a carnival. It’s out of this world fun. It gets super crowded and you’ll need tickets to the shows so be sure to book in advance. You can even walk the viking procession to the bonfire!

Check out my travel guide to Edinburgh for more information on taking a holiday there.

BONUS: 11. Anywhere your friends are!

New Years with Friends
No matter where you are in the world, this holiday is about celebrating with friends and family. Wherever they are will be the best place to celebrate. Who wants to spend such a great day with strangers? Paris, London, New York, a jungle, the beach, your home — it doesn’t matter. As long as you are with those you like and love, it will be the best New Year’s party in the world.

****

New Years is an incredibly fun holiday where you can cut loose, stay up late, wash away the old, and ring in the new. If you’re looking for the best places to celebrate new years eve in the world, look no further than this list. But remember, no matter where you are, so long as you are with people you enjoy, you’re in the best place to celebrate!

I’ll be celebrating New Year’s Eve in Colombia so if you’re down there, say hi!

For other top travel lists and destination ideas, check out these posts:

Book Your Trip: Logistical Tips and Tricks

Book Your Flight
Find a cheap flight by using Skyscanner or Momondo. They are my two favorite search engines because they search websites and airlines around the globe so you always know no stone is left unturned.

Book Your Accommodation
To find the best budget accommodation, use Booking.com as they consistently return the cheapest rates for guesthouses and cheap hotels. I use them all the time. You can book your hostel – if you want that instead – with Hostelworld as they have the most comprehensive inventory.
Don’t Forget Travel Insurance
Travel insurance will protect you against illness, injury, theft, and cancellations. It’s comprehensive protection in case anything goes wrong. I never go on a trip without it as I’ve had to use it many times in the past. I’ve been using World Nomads for ten years. My favorite companies that offer the best service and value are:

Looking for the best companies to save money with?
Check out my resource page for the best companies to use when you travel! I list all the ones I use to save money when I travel – and I think will help you too!

Photo Credit: 1, 2, 3, 4, 5, 6, 7, 8, 9,

The post Top Ten Places to Go for New Year’s Eve appeared first on Nomadic Matt's Travel Site.