Do You Need Medical Evacuation Insurance?

A commercial airplane flying in a dark sky
Posted: 8/29/19 | August 29th, 2019

While most budget travelers are content with a standard travel insurance package, today I wanted to talk about one specific aspect that I get asked about a lot: buying extra medical evacuation insurance.

When I first started roaming the world, I assumed that standard travel insurance would cover the cost of getting back home should I get injured abroad. Isn’t that what their “medical evacuation” coverage does?

I was shocked to discover that, more often than not, that isn’t the case.

Turns out, just because you get injured and require medical transportation doesn’t mean you get sent home.

If you read the fine print, most travel insurance companies only cover your medical transport to the “best” medical facility near where you are. This is what they call the “nearest acceptable facility.”

They decide where you go, not you.

They decide what the best facility is.

They decide what is suitable.

And once your travel insurance company sends you to a hospital, they have fulfilled their obligation to you. That means that if you’re not sent home, you could be liable to then cover the cost of getting home — which can be a lot of money.

Now, this is not to say that “regular” travel insurance is bad. It just means that people think it covers a lot more than it does and are often upset when they find out otherwise. I mean, I love travel insurance (I never leave home without it), but it’s important to know its limitations. Always read the fine print!

This is where comprehensive medical evacuation insurance can come in handy in addition to your existing travel insurance plan.

What is Medical Evacuation Insurance?

First, let’s get one thing clear: Medical evacuation insurance is not the exact same thing as travel insurance (and vice versa).

Of course, travel insurance generally includes medical evacuation insurance, but travel insurance is specifically designed to protect travelers from financial loss in the event of trip interruptions and cancelations, as well as injuries while abroad.

Cut yourself on a rock while hiking? Travel insurance will help.

Baggage lost or delayed after a flight? Travel insurance will help.

Someone pickpocket your phone? Travel insurance will help.

For most travel and medical emergencies, travel insurance will suffice.

But where it often falls short is when you need to be repatriated.

Most travel insurance plans do include decent coverage for medical evacuation — but they only take you to the nearest facility that can handle your emergency. This means:

  • No guarantee of going home
  • No guarantee of going to the absolute best medical facility to assist you
  • No guarantee of someone on the ground to walk you through the process — you’re usually left to handle all of that on your own.

And for some people, that’s not good enough.

Why is Medical Evacuation Insurance So Important?

When I was stabbed in Colombia, I went to a local hospital. I was on my own, left to navigate the process with what little broken Spanish I knew. While I received basic medical care, it was not exactly the best in the world. I flew back to the US shortly after that to get the care I needed.

I was lucky that I didn’t require surgery and that I was able to handle the situation on my own. I didn’t necessarily need medical evacuation insurance for that incident.

But not everyone will be that lucky. Earthquakes, monsoons, hurricanes, floods, and fires do happen — and the list goes on.

Each and every year, 10 million travelers are hospitalized abroad — with over two million requiring medical transportation!
And should you need to be evacuated due to an injury, weather event, or political crisis, you definitely don’t want to be stuck with a pricey repatriation bill. After all, evacuation and transportation aren’t cheap. Costs for a medical evacuation or medical transfer can range from $30,000 to upwards of $200,000.

Yes, you read that right: $200,000!

Unless you have that kind of money lying around, you’ll want to make sure the insurance that you buy covers you for medical evacuation, transportation, transfers, and repatriation. You don’t want to be stranded at a foreign medical facility — especially if that facility doesn’t provide the degree of care that you need.

While these sorts of emergencies are rare, it’s much better to pay a small fee now than to risk going bankrupt because of an unexpected injury. Because $200,000 is a LOT of money!

Just as important as the financial argument for medical evacuation insurance is the fact that having comprehensive coverage gives you peace of mind. You and your loved ones can relax, knowing that, should the worst happen, you have a company there that is ready and able to help you get through it. The last thing you want on your vacation is to be fretting about the fine print on your insurance policy.

Over the past 10 years, I’ve had to deal with all sorts of hiccups on the road, from minor inconveniences, like a broken camera and lost baggage, to more serious situations, like when I burst my eardrum.

Take it from me: peace of mind is worth the price.

That’s why it’s important to be prepared.

That’s why more and more travelers are joining membership programs for comprehensive medical evacuation insurance.

Our Recommended Company

Medjet is a membership program that offers comprehensive medical transportation services all around the globe. It has 50 dispatch stations worldwide, with access to over 250 air ambulances. That means that as long you’re not in a warzone or country prohibited to travel by the US State Department, you will be able to receive the medical transport coverage and evacuation services that you need.

Medjet focuses solely on medical evacuation coverage, making it the go-to company for travelers concerned about medical evacuation and repatriation. All the travel pros I know use it.

Where most insurance companies will just take you to the nearest medical facility, Medjet will make sure you get home.

Additionally, Medjet will:

  • Allow you to choose what hospital or medical facility you want to go to.
  • Arrange medical transfer (regardless of medical necessity).
  • Provide service both within the US and abroad.
  • Initiate a security response and evacuation even if there is no government warning to do so.

However, it is also extremely affordable — I’m still a budget traveler after all! Medjet offers both short-term and annual plans. An annual membership can cost as little as $295 USD per year, which is amazing value if you’re an avid traveler.

If you’re looking for coverage that goes above and beyond what most companies offer, you’ll want to consider Medjet — especially if you’re concerned about the cost of a medical evacuation.

It’s also the perfect choice for anyone looking to do adventurous activities or travelers who are heading into a region where extreme weather events (such as hurricanes or floods), fires, or earthquakes are common.

***

Nobody likes to imagine something going wrong on their trip. But accidents and emergencies do happen. Make sure you have the evacuation insurance coverage you need on your next trip. You won’t regret it!

Book Your Trip: Logistical Tips and Tricks

Book Your Flight
Find a cheap flight by using Skyscanner or Momondo. They are my two favorite search engines because they search websites and airlines around the globe so you always know no stone is left unturned.

Book Your Accommodation
You can book your hostel with Hostelworld as they have the largest inventory. If you want to stay somewhere other than a hostel, use Booking.com as they consistently return the cheapest rates for guesthouses and cheap hotels. I use them all the time.

Don’t Forget Travel Insurance
Travel insurance will protect you against illness, injury, theft, and cancellations. It’s comprehensive protection in case anything goes wrong. I never go on a trip without it as I’ve had to use it many times in the past. I’ve been using World Nomads for ten years. My favorite companies that offer the best service and value are:

Looking for the best companies to save money with?
Check out my resource page for the best companies to use when you travel! I list all the ones I use to save money when I travel – and that will save you time and money too!

The post Do You Need Medical Evacuation Insurance? appeared first on Nomadic Matt's Travel Site.

FLYTE Update: Here’s What Happened to the Students We Sent to Colombia

the FLYTE students on a field trip in Colombia standing in front of a yellow church
Posted: 8/26/2019 | August 26th, 2019

When I started my nonprofit Foundation for Learning and Youth Travel Education (FLYTE), my goal was to make international travel accessible to low-income youth across the country, who are incredibly passionate and smart but would never have the opportunity to travel abroad otherwise.

Earlier this year, we raised $15,000 to send a group of kids from Envision Academy to Colombia.

Located in Oakland California, Envision Academy uses an innovative project-based learning model to ensure that its students — the majority of whom live below the poverty line — are ready for post-secondary education and beyond. (Most are first-generation immigrants and will be the first in their family to go to college.)

Last month, they returned from their exciting trip to the country so I wanted to share some of what they did and learned, so you can see what your support accomplished. For most of the students, it was their first time in another country and, needless to say, it had a big impact on them.

Our group started in Bogotá, where they climbed to the top of Cerro de Monserrate and explored Plaza Bolívar, where Jeremy, the teacher leading the trip, gave a cross-curricular lecture about Simon Bolívar, Colombia’s history during the drug cartel years, and the architecture around them. They also went on a street art tour led by two local artists, on which they learned all about art techniques and the political climate that prompted many of the pieces that they saw.

the FLYTE students enjoying a street art tour in Colombia

The students immediately started seeing commonalities between Oakland and Colombia. Darrilyn, a fifteen year old sophomore, remarked that this trip, her first time out of the country, “changed my perceptions and preconceived notions of Colombia a lot, and I saw that it’s more like home than I previously thought.” She also “really enjoyed this walking tour because I like art and I like graffiti because it’s unconventional art and it tells the story of a person.”

Afterward, the group headed to Cartagena. They got a perfect intro to the city on a walking tour through our partner, Context Travel, during which they learned a lot about Cartagena’s history as a port for enslaved people. This resonated with the students, who stressed how important it was for more people to have this knowledge. Kai, whose new passport got its first stamp on this trip, had the realization that “when people think about Latin America, they often don’t think about people of African descent.”

the FLYTE students on a tour around Cartagena with Context Tours

Myani, who’s 17 and just graduated from Envision Academy, was equally moved: “It’s inspiring in a way because even though our ancestors were enslaved, they made the city what it is. You can see their value to the community. Even though there’s an oppressive connotation, because they were enslaved, flip it and make it a powerful lesson. Make it your own: My ancestors built this city.”

On top of all this, the students immersed themselves in Colombian cuisine by taking a street food tour with Cartagena Connections. They tried everything from ajiaco and arepas to bandeja paisa, mango biche, and a bubble gum soda.

One of the highlights of the trip was visiting Cartagena’s Barrio San Francisco with Alex Rocha from Experience Real Cartagena, whose tours are designed to make deeper connections with the marginalized communities of Colombia. (Alex’s company also operates as a social enterprise, and so the proceeds fund an after-school program for the local community.) Our students had an opportunity to connect with some of these youth through activities like drawing, dancing, and soccer, as well as through honest conversations about their shared experiences.

the FLYTE students in Colombia

Aliza, a sophomore and president of the student council who had never left the US before, felt that this was the highlight of her trip because she was able to “see the kids and understand their environment and how they live every day.” Jany, who is seventeen and served as the de-facto translator for our Spanish-speaking parents, reflected on how the kids she met “make the best out of what they have. They’re grateful and humble and always try to find something positive.”

Tayvion, a 14-year-old who also was traveling abroad for the first time, had a deep conversation with one of the Colombian kids about police brutality. When Tayvion asked if they had guns, his new friend replied, “Yes, but they never shoot.” Having drawn parallels and distinctions with his own community, Tayvion shared his devastating realization: “It made me think about how, for officers in the U.S., their first instinct is just to shoot.” (To me, that’s a sad statement coming from a kid and just shows you up much police violence is an everyday fact for many people in this country.)

the FLYTE students on a walking tour in Colombia

Throughout this entire journey, the group took part in daily reflections. They shared their experiences, learned from one another, and bonded over how they’d changed throughout the trip.

Joshua, a sophomore who had never even left California before this trip, said that the biggest lessons he’d learned were: “Do not take the things you have for granted. Do not be afraid to try new things. Finally, don’t be scared to learn about new people.”

For Wald, a soon to be junior, reflected that on how “we should be open-minded about other cultures and people ’cause we might find some similarities between us and them. We shouldn’t judge a people or culture based on their past alone.”

the FLYTE students on a walking tour in Colombia

These new experiences not only shifted their mindset, but they also made the students think about their future and goals. Yasmeen told us, “I have a lot of dreams. There are so many benefits in the US, and I’m not going to waste my time. I should travel more and learn about different cultures.”

In addition to the knowledge that she gained, Veronica shared that her “goals are to help my community with any of the work that I do. I think this trip is going to help me achieve that because I’ve realized how similar my community is with the community of Cartagena. We can use other cities from different countries to help each other with the issues we are going through.”

Similarly, Ronald, a student who was excited to relay his experiences with his stepmom (who’s from Colombia), shared that “this trip made me open-minded to different cultures and makes me propose solidarity within communities in Oakland.”

And, in a quote I especially love, Darrilyn said of her time in Colombia: “My hopes and dreams are to be a political analyst and to travel the world. This trip showed me there is no fear to travel.”

This is why FLYTE exists: to create moments and lessons like this for students so they can see the world outside their borders and dream big.

the FLYTE students at the airport leaving for Colombia

The experiences these students had in Colombia left an indelible mark on them. Most of them had never been on a plane before their trip to Colombia. Not only did they learn about the culture and history of another country but they also discovered how a community can rise up in times of adversity.

On the last days of their trip, the students started planning how they’re going to take action back home. One of their ideas was to create a mural, much like the ones they saw in Colombia, to educate others about how Oakland continues to overcome its struggles.

Because of this trip, these youth now have a bigger understanding of the world and the power they each have to change it for the better.

***

And, so, our mission continues!

I want to thank you for helping make this happen! It takes an entire network of passionate individuals and businesses to run one of these trips, and we wanted to celebrate some of our partners who made this trip such an unforgettable experience for our students:

  • World Nomads, which donated all of our travel insurance. Knowing that they had us covered for any unforeseen circumstances, like lost luggage, gave us such peace of mind.
  • Selian Hostel in Cartegena for providing tours and breakfast for the students free of charge.
  • Javier from MYGHT travel, who made the daunting process of booking flights for a group of 20+ a seamless and stress-free experience.
  • Context Travel, which worked with us to craft unique, immersive experiences (at a discount!) for our students.
  • Alex Rocha from Experience Real Cartagena for opening up his community to us and providing us with a deep connection to the amazing people of Barrio San Francisco.
  • Bluffworks, one of our newest corporate partners, which covered the costs of three students to take this journey of a lifetime.
  • Allyson and the team from wikiHow, who highlighted us on their platform and sponsored one student on this trip.
  • The International TEFL Academy, for donating 50% of the proceeds from its Teach Abroad Film Festival to FLYTE.
  • Lo & Sons, for matching donations during our wildly successful #GivingTuesday campaign and sharing our story with their audience.
  • Lia from Practical Wanderlust, who paid her own way to join the trip and captured so many incredible photos and videos. She was also the mastermind behind FLYTE’s IG stories during the trip! We love how she was able to document the students’ experience in such an authentic, powerful, and unintrusive way.

Last, but certainly not least, many thanks to the thousands of you that donated to FLYTE. Your generosity over the years has sent 70 students on life-changing journeys abroad. The impact of these trips extends beyond just these youth. Because of you, the wave of positive change will ripple through their communities and the world at large. With them taking the lead, I know without a doubt that our future is bright. Thank you all for making such an immeasurable impact!

As the world builds walls, we’re helping tear them down and showing a new generation that there is more that brings us together than tears us apart.

If you want to learn more about FLYTE and how you can help send more students abroad, click here for more information.

Book Your Trip: Logistical Tips and Tricks

Book Your Flight
Find a cheap flight by using Skyscanner or Momondo. They are my two favorite search engines because they search websites and airlines around the globe so you always know no stone is left unturned.

Book Your Accommodation
You can book your hostel with Hostelworld as they have the largest inventory. If you want to stay somewhere other than a hostel, use Booking.com as they consistently return the cheapest rates for guesthouses and cheap hotels. I use them all the time.

Don’t Forget Travel Insurance
Travel insurance will protect you against illness, injury, theft, and cancellations. It’s comprehensive protection in case anything goes wrong. I never go on a trip without it as I’ve had to use it many times in the past. I’ve been using World Nomads for ten years. My favorite companies that offer the best service and value are:

Looking for the best companies to save money with?
Check out my resource page for the best companies to use when you travel! I list all the ones I use to save money when I travel – and that will save you time and money too!

Photo Credit: All photos belong to Lia from Practical Wanderlust who was there helping document the trip!

The post FLYTE Update: Here’s What Happened to the Students We Sent to Colombia appeared first on Nomadic Matt's Travel Site.

The Complete Guide to Diving in Koh Tao

Alex in Wanderland diving in the waters near Koh Tao, ThailandUpdated: 8/22/2019 | August 22nd, 2019

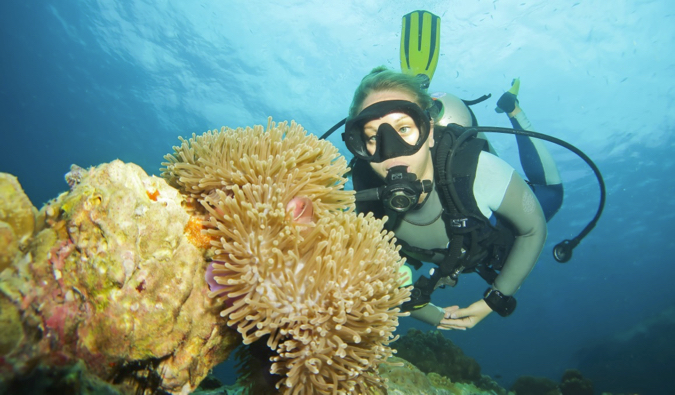
This is a guest post by Alexandra Baackes, the legend behind Alex in Wanderland. She’s also a PADI divemaster and a resident of Koh Tao, Thailand. Koh Tao is a popular destination for scuba divers and one the the biggiest places people learn in the world! In this guide, Alex gives you the insider scoop on diving schools, prices, and the best areas for viewing sea life when you visit Koh Tao.

Travelers in Thailand like to label their destinations neatly. Intricate island paradises are boiled down to one or two simple words or associations: Koh Phi Phi? The Beach. Koh Phangan? The Full Moon Party. Koh Tao? Diving.

Some of them are fairly well deserved.

After all, Koh Tao is one of the world’s top destinations when it comes to number of annual dive certifications issued — in fact, it’s second only to Cairns, Australia. Travelers flock from across Southeast Asia to take their first breaths underwater in the coral reefs fringing this paradise island. It’s simple to see why: the courses are among the most affordable in the world, the teaching standards are high, the conditions are easy, the dive sites are abundant, and it’s a dang fun place to decompress after a day underwater.

It’s easy to be overwhelmed when planning a trip to Koh Tao — there are more than 70 dive schools on the island! — so a bit of research goes a long way when it comes to such a large investment of your time and travel budget.

PADI or SSI?

A massive shark swimming above a diver in the waters near Koh Tao, Thailand
There are more than 50 scuba diving training systems around the world, but in Koh Tao, the choice generally comes down to two: the Professional Association of Dive Instructors (PADI) or Scuba Schools International (SSI). Each organization develops its own teaching materials; writes its own standards based on those set by the umbrella organization, the World Recreational Scuba Training Council (WRSTC); and awards its own certifications.

No matter what certification card you walk away with, you’ll use the same equipment, see the same fish, and be able to dive at the same destinations. Certifications are interchangeable and recognized worldwide. The most important factors in the quality of your course will be your dive school and your dive instructor. But there are minor differences between agencies.

PADI
PADI is the world’s leading scuba diving training organization. If you find comfort in numbers, then
this agency with nearly one million certifications per year might just be for you! The major benefit to diving with PADI comes at the professional level. For instructors and divemasters, PADI provides the most employment opportunities, and PADI instructors can work independently (while an SSI instructor must teach through an SSI-registered shop). So if you have dreams of staying in Thailand to teach the backpacker masses and you want to be loyal to one agency, PADI is a strong agency to hedge your bets on.

SSI
Once just a small subset of the diving industry here, SSI has exploded to control a full 50% of the market share on Koh Tao. The benefit of doing an SSI certification comes down to best bang for your baht, as an SSI course will typically cost you nearly 10% less than a PADI course. If you’re coming to Koh Tao specifically for its status as one of the world’s cheapest places to get certified, those extra baht can make a big difference. Plus, all coursework is done via the free app and/or online, making it a green choice.

What’s the Course Like?

Alex in Wanderland diving in the water with a groupd of friends near Koh Tao, Thailand
The Open Water course is the first certification you’ll complete as a diver. Many divers come to Koh Tao to complete their Open Water certification, and some get hooked and stay till they’re instructors themselves. But be wary of “zero to hero” packages that include the full array of courses from first underwater breath to master scuba diver trainer — take it one step at a time.

(While half-day experiences called “Discover Scuba Diving” or “Try Scuba Diving” are available, they don’t lead to any sort of certification and should really only be considered if you’re (a) super strapped for time or (b) extremely unsure if diving is for you. Otherwise, just dive in, literally, to the Open Water!)

The typical Open Water diving course is completed in three to four days. There are videos to watch, book chapters to read, tests to take, and, of course, dive sites to explore! It might sound intimidating, but the course is designed for students as young as 10 — the academics shouldn’t intimidate you.

Here’s a rough outline of what your course will look like:

  • Day 1: Orientation, paperwork, and videos.
  • Day 2: A morning in the classroom learning about basics skills, equipment, and the effects of diving on the body. An afternoon spent in the pool or at shallow dive sites working on skills such as regulator recovery and mask removal, among others.
  • Day 3: A morning in the classroom finishing knowledge reviews and taking some quizzes. In the afternoon, the fun really begins with open-water dives 1 and 2, which will stay shallow and low-key. Some skills will be practiced during the dives.
  • Day 4: You’ll go out on a morning boat and complete open-water dives 3 and 4, where you’ll get to go a bit deeper and explore. In the afternoon, you’ll take the final exam. Congratulations — you made it!

Upon completion, you’ll receive a certificate that allows you to dive anywhere in the world with another certified buddy, independent of a professional, to a depth of 18 meters.

And the Open Water course is just the beginning! Koh Tao is a true mecca for dive education: you can take courses in freediving and technical diving, and specialty scuba courses in everything from photography to conservation and beyond — plus the gamut of continuing and professional courses up to Instructor Trainer!

Which School Should I Choose?

A massive school of long fish in the waters of Koh Tao, Thailand
Koh Tao ain’t called a mecca for diving for nothing: there are nearly 70 dive schools on this 13-square-mile rock! This decision is the biggest when it comes to determining the quality of your diving course. For the most part, the schools fall into a few categories:

Big schools: Bans, Big Blue, Crystal
These schools are enormous scuba powerhouse resorts that can churn out hundreds of Open Water divers a week, with instructors for almost every language imaginable. They are ideal for someone who is confident about going under water (i.e., doesn’t need extra individual attention) and wants to make lots of friends and meet people in a big group setting. However, those groups can be a bit large for comfort.

Medium-sized schools: Master Divers, Sairee Cottage
Medium dive schools generally have the best of both worlds. They have a range of instructors and groups large enough to make friends in, but they aren’t as prone to overcrowding or rushing through the course.

Small schools: Hydronauts, Ocean Sound
These schools are great at accommodating special needs or focusing on a certain specialty. The extra attention with instructors is key for those who are feeling uncertain about heading underwater or who simply want to be spoiled with attention and learn in a more focused environment. However, these schools sometimes rent boat space and pool time from other dive schools rather than having their own facilities.

When picking a school and an instructor, consider these factors:

  • Does it have an instructor who speaks your language? There are many specialty language-focused dive schools on Koh Tao: for Spanish, head to Pura Vida or La Bambona; for French, French Kiss Divers; for Finnish, Koh Tao Divers.
  • Will the confined dives take place in the ocean or in a pool?
  • How many students will be in the group?
  • What time do they leave in the morning? Those eager beavers who want to be the first on the dive site might not mind being up in time for New Way’s 6am departure, while night owls might prefer Ban’s or Sairee Cottage’s more relaxed dive times.
  • Is the equipment up to date and in my size? Schools in Koh Tao have a good record for equipment range and maintenance, but it never hurts to ask.
  • Will you get to have my own dive computer throughout the course? Will there be an extra charge?
  • How qualified is the instructor? Some students may appreciate the enthusiasm and up-to-date training of a new instructor, while others may find comfort in a teacher with tons of qualifications and years of experience.
  • Do you like the instructor?

How Much Will It Cost?

Alex in Wanderland posing for a photo on Koh Tao, Thailand
Open Water courses on Koh Tao range from 9,200 to 10,800 baht ($300–350 USD) — without accommodation. (Once upon a time, almost every dive school on the island bundled accommodation in with their courses, but that’s becoming more and rarer outside the largest dive resorts. If accommodation is included, it’s a very basic fan room — or you can upgrade to a nicer one at a discount.)

Though it’s less common these days, many schools will have a videographer come along on dives 3 and 4 and make a 10-20-minute music video–style recording of your day. At night, the class will gather to watch it. Depending on the video company, they may charge you a flat rate for a copy or base it on how many copies are sold — so you can take one home for anywhere from 1,000 to 3,000 baht ($32–97 USD). Some schools have switched to providing still photos instead, which you can purchase as part of a package — expect to pay around 300 baht ($10 USD) for one photo or 1,000 ($32 USD) for a set of several.

Though it’s not an agency standard, many schools have a policy that students can’t bring their own cameras out on Open Water Courses, so don’t freak if you aren’t allowed to bring your GoPro — they aren’t trying to bully you into buying a video or photo package; they are trying to keep you safe, keep you focused, and avoid damage to reefs and marine life until buoyancy is mastered.

For divers who have already completed their Open Water course, fun dives cost around 700–1,000 baht ($23–32 USD) each, depending on how many dives you’ll do and if you have your own equipment. Those with time and money constraints will want to make it a priority to visit at least one of Koh Tao’s premier dive sites.

What are the Can’t-Miss Dive Sites?

Alex in Wanderland leaping into the water to start a dive in Thailand
If you’re a brand new diver doing your Open Water course on Koh Tao, quite frankly, it doesn’t matter where you go — you’re going to love it! You’ll be so focused on your skills and the magic of breathing underwater for the first time, you won’t really notice the differences between different dive sites yet anyway.

Twins
Twins is a very common training dive site used for dives 1 or 2 of the Open Water course. Twins sits just off the coast of Koh Nang Yuan and is perfect for new divers, thanks to its shallow depth. A highlight here is the family of rare saddleback clownfish inside an anemone that you can’t miss — there’s a ring of rocks around it!

White Rock
White Rock is another one of the most commonly visited dive sites on Koh Tao, frequently for dive 4 of the Open Water course. It’s an enormous dive site, providing a wide sampling of Koh Tao’s marine life — including the odd sea turtle who lumbers through. Read more about diving White Rock here.

Southwest
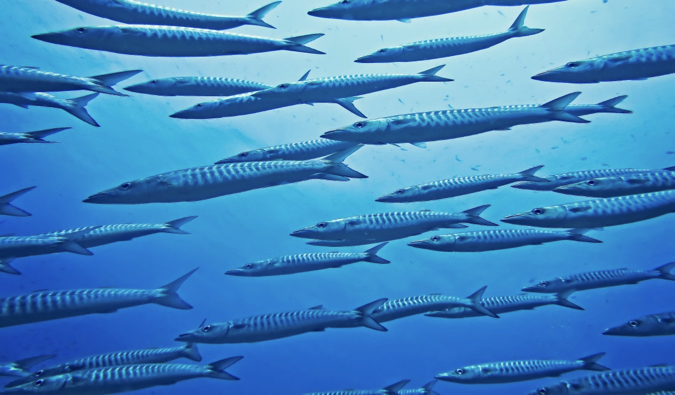
Southwest is a collection of pinnacles carpeted in soft coral anemone and
the pink anemonefish that accompany them. This is a great site for spotting barracuda and giant groupers. It’s located 13km southwest of Koh Tao and is almost always visited on the morning boats. With pinnacle depths from 6m to 27m, it’s perfect for anyone from Open Water certified and up. (Feeling adventurous? There’s a secret pinnacle here as well.) Read more about diving Southwest here.

Shark Island
Shark Island is so named for its resemblance to a dorsal fin, rather than an abundance of certain toothy fish. The north side is best known for its diversity of coral, while the south side has unique soft corals you won’t see elsewhere on Koh Tao. The rocky outcrop is located southeast of Koh Tao and is a less commonly visited site due to both its location and its often challenging conditions — both current and visibility can be a struggle here. Read more about diving Shark Island here.

HTMS Sattakut
This former US Navy ship was sunk in June 2011 off the coast of Sairee Beach and has become home to Jenkins’ whiprays, great barracuda, and dozens of gobies playing hide-and-seek in rusty crevices. The wreck doesn’t start until about 18m and sits down at 30m, so you really need to be Advanced Open Water certified or do a Deep Adventure Dive to enjoy it fully. To penetrate, you must have or be training for a wreck specialty.

One of the HTMS Sattakut’s greatest assets is its location less than 15m from neighboring dive site Hin Pee Wee. So you can compliment a spin around
the wreck with a zip around the coral reef. Hin Pee Wee features several pinnacles, a resident turtle, and some impressive macro life. Read more about diving the HTMS Sattakut here.

Chumphon
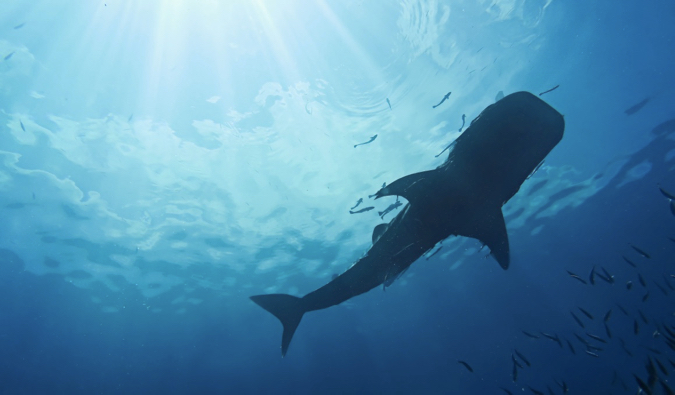
Chumphon is a submerged granite pinnacle covered in colorful sea anemone and surrounded by large schools of trevally, batfish, and barracuda. Lucky divers will spot giant groupers, pompanos, and even whale sharks. Due to its depth, this is a dive site best enjoyed by Advanced Open Water students.

Chumphon is almost always visited on the morning boats. Due to the distance — it’s 11km from Koh Tao — and the size of this dive site, some schools schedule two dives in a row here. Read more about diving Chumphon here.

Sail Rock
Sail Rock is considered the premier dive site in the Gulf of Thailand. Don’t miss “the chimney,” a beloved, not-so-secret swim-through, and a deeper secondary pinnacle east of the main rock. This granite, deep-ocean pinnacle rises from 30m and breaches the surface, a welcome sight after the two-hour boat ride from Koh Tao.

Occasionally, you can get lucky and complete dives 3 and 4 of your open water here for an extra fee, though generally, this is a specialty trip costing anywhere from 2,500 to 3,500 baht ($81–113 USD) and including three dives, breakfast, lunch, and a beer on the way back. A handful of schools take trips to Sail Rock but most only go once a week, so plan accordingly. Read more about diving Sail Rock here.

When to Dive on Koh Tao

A colorful school f fish in the waters of Koh Tao, Thailand
Most island divemasters agree that April and May are the best months — they’re warm and clear, and the sea is flat. And in recent years, they’ve been chock full of whale shark sightings! Plus you could time your trip to spend Songkran (Thai New Year’s) on Koh Tao (mid-April).

That said, there isn’t really a bad time to dive on Koh Tao, outside of November and December, when winds and can be high and the weather can be dicey, causing boat rides to be unpleasant and visibility to be poor.

***

Learning to dive on Koh Tao should be approached with caution, as it can lead to a very serious addiction to the diving hobby and lifestyle! Many a dive virgin has arrived by ferry with plans to stay a few days and get certified, only to find themselves months later calling the island home and working toward becoming a scuba diving instructor.

Alexandra Baackes is the author of The Wanderland Guide to Koh Tao (which is an incredible guide to the island! and founder of Wander Women Retreats, which hosts an annual women’s dive and yoga retreat on Koh Tao. She overshares about travel, diving, and life as an entrepreneur on her blog Alex in Wanderland and on her Instagram @alexinwanderland.

Book Your Trip to Thailand: Logistical Tips and Tricks

Book Your Flight
Find a cheap flight by using Skyscanner or Momondo. They are my two favorite search engines because they search websites and airlines around the globe so you always know no stone is left unturned.

Book Your Accommodation
You can book your hostel with Hostelworld. If you want to stay somewhere other than a hostel, use Booking.com as they consistently return the cheapest rates for guesthouses and cheap hotels. I use them all the time. My favorite places to stay are:

  • The Dearly Koh Tao Hostel – The eco-friendly hostel offers a bar, cafe, restaurant, pool, and rooftop terrace. It’s a great place to relax and connect with other travelers.
  • Gecko Republic Jungle Hostel – You’ll be hard pressed to find a cleaner hostel with staff as friendly as those that work at Gecko. It’s easy to meet people here and there is AC available too!

Don’t Forget Travel Insurance
Travel insurance will protect you against illness, injury, theft, and cancellations. It’s comprehensive protection in case anything goes wrong. I never go on a trip without it as I’ve had to use it many times in the past. I’ve been using World Nomads for ten years. My favorite companies that offer the best service and value are:

Looking for the best companies to save money with?
Check out my resource page for the best companies to use when you travel! I list all the ones I use to save money when I travel – and I think will help you too!

Want More Information on Thailand?
Be sure to visit our robust destination guide on Thailand for even more planning tips!

The post The Complete Guide to Diving in Koh Tao appeared first on Nomadic Matt's Travel Site.

How to Avoid Paying Bank Fees While Traveling

An ATM lit up at night against a purple brick wall
Updated: 8/22/2019 | August 22nd, 2019

Saving money for travel is one of the biggest obstacles that keeps people rom realizing their travel dreams.

Yet, all too often, I see travelers throwing money away in avoidable bank fees.

Banking overseas is more than just putting your card in an ATM and taking out money. There is a lot more to consider — especially if you want to become a savvy traveler!

When you travel on a budget, banking overseas involves knowing three things:

  1. How to avoid paying bank fees.
  2. How to eliminate foreign transaction charges.
  3. How to get a good exchange rate.

I know too many people who travel abroad and end up paying obscene ATM fees and credit card transaction fees. All because they didn’t do their research and plan ahead.

In 2019, there’s absolutely no need for it. You didn’t save up all this money in order to give it the banks, right? I know I didn’t. I want to keep it all for myself because every avoided fee is more money for food, drinks, and activities on the road!

Want to save more money on your next trip abroad? Here is how you eliminate ALL bank fees when you travel in 5 easy steps!


1. Eliminate ATM Fees

ATM fees can really add up — especially if you’re traveling for weeks or months at a time. Let’s think about it: While you’re on the road, you will probably withdraw money from an ATM twice a week. Fees vary around the world, but on average you end up paying around $3-5 USD per withdrawal. That is $10 per week, $40 per month, or $520 per year! Do you know how many days you could spend in Southeast Asia for that amount? Almost 3 weeks!

Even if you only use the ATM half the time, that’s still $260 USD per year. And most travelers I know go to the ATM even more than twice a week, which only increases the amount in fees they pay. Why give banks money you need for travel? You did a lot of work saving your money — don’t waste it by giving it to a bank.

To help you avoid fees, here are four things you’ll want to do on your next trip to eliminate those pesky fees:

First, pick a bank in the Global ATM Alliance. This is a network of large banks that have come together and waived fees and allows for free ATM withdrawals. While they have the high fees ($5 USD per withdrawal) for banks outside their network, by using partner ATMs you can avoid ATM charges entirely.

Below is a list of major banks in this alliance:

  • Bank of America (United States)
  • Barclays (England, Wales, Spain, Portugal, Gibraltar and certain countries in Africa)
  • BNP Paribas (France, Ukraine, Turkey, Poland, Morocco, Italy, New Caledonia, Réunion, Guyane, Guadeloupe, Martinique, and Luxembourg)
  • Deutsche Bank (Germany, Poland, Czech Republic, Spain, Portugal and Italy)
  • Banca Nazionale del Lavoro (Italy)
  • Scotiabank (Canada, Caribbean, Peru, Chile, and Mexico)
  • Westpac (Australia, New Zealand, Fiji, Vanuatu, Cook Islands, Samoa, Tonga, Papua New Guinea, and Solomon Islands)

Be sure to check with your local bank on specific coverage areas. There are some exceptions, i.e., if you use your Barclays card in one country, there might not be a fee, but in another, there may be. Other fees, such as an international transaction or foreign currency fee, may also still apply so double-check before you go!

Note: Bank of America charges a 3% foreign transaction fee on all withdrawals not in USD.

Secondly, if you are a US resident, the best bank to use is Charles Schwab.

Why?

Charles Schwab has no fees and reimburses all your ATM fees at the end of each month. You will need to open a high-yield checking account in order to qualify, but there is no minimum deposit required and no monthly service fee. Their ATM card can be used in any bank machine around the world, and you’ll never pay a fee. This is my primary bank card and I’ve been using it for years. Since getting it, I’ve avoided all ATM fees. It’s literally saved me thousands of dollars over the past decade of traveling the world.

Third, get a low-fee card. I use HSBC as my backup because HSBC has ATMs all over the world and charges only $2.50 USD per ATM transaction when you use a non-HSBC ATM. While it’s not as good as zero, it’s still better than what a lot of other banks charge. Additionally, Capital One doesn’t charge any withdrawal fees, but you do have to pay any fees charged by the local bank.

Finally, ask your local bank or credit union. Not charging ATM fees has become a widespread practice over the last few years, so make sure to ask your local bank.

Here are some suggested ATM cards for non-US travelers:

Canada: Scotia or Tangerine are a part of the Global ATM Alliance.
Australia: ING, Citibank, or HSBC have no feed cards.
UK: UMonzo or Starling let you avoid ATM fees abroad.

If you are looking for other ways to cut wasteful expenses on the road, visit this collection of all my best tips for further money savings.
 

2. Avoid Credit Card Fees

The next major fee we need to get rid of is the credit card foreign transaction fee. Most credit cards charge a 3% fee on purchases made overseas. That can add up since most of us use our credit card for everything. It’s become a lot more common for credit cards to waive that fee since if you use your card a lot overseas, you’ll probably use it a lot anywhere. My favorite no overseas transaction fee cards are the Chase Sapphire Preferred, Barclay Arrival Plus, Capital One, and Citi Premier. (For more suggestions, you can find all my favorite travel cards here.)

If you use these cards overseas, you won’t pay 3% and you’ll save a lot of money!

For non-US citizens, check the following websites that list cards that might not charge any overseas fees:


3. Minimize the Exchange Rate “Penalty”

Every time you use your card overseas, your local bank coverts the transaction into your local currency for billing purposes and takes a little off the top for doing so. Thus the official rate you see online is not what you actually get. That’s the interbank rate, and unless you become a major bank, you’re not going to get that rate. All we can do is get as close as we can to that rate. To avoid being on the real losing end of conversion, follow the following tips:

Use a credit card — Credit card companies get the best rates. Using a credit card will get you an exchange rate closest to the official interbank currency rate so avoid an ATM or cash if you can.

Use an ATM — ATMs offer the best exchange rate after credit cards. They aren’t as good as credit cards since commercial banks take a little more off the top, but it’s much better than exchanging cash. Money exchange offices offer the worst rates because they are so far down the food chain, they can’t get the best exchange rate (plus, they usually charge a commission as well).

Don’t use ATMs in weird locations — Using those ATMs you find in hotels, hostels, local 7-11s, or some other random place is a bad idea. They’re convenient, but you’ll pay for that convenience. They always charge high ATM fees and offer horrible conversion rates. Skip those ATMs and find a major bank.

Here’s a video that highlights just how sneaky these companies can be:


4. Don’t Change Money at Airports

Most exchange bureaus in airports are so far down the financial food chain they don’t have the clout to offer good exchange rates. The rates you see at airports are the worst — never, ever use an exchange bureau there unless you absolutely have to. Another tip: avoid using the company Travelex at all costs — they have the worst rates and fees. Never, never use them. Avoid their ATMs too!
 

5. Always Pick the Local Currency

When you use your credit card abroad, you will often be given the option to be charged in your home currency (i.e., instead of being charged in euros, they will charge you in US dollars). Never say yes. The rate at which they are converting the currency is always worse than the rate your bank will give you. Pick the local currency and let your credit card company make the conversion. You’ll get a better rate and save some money in the process.
 

6. Don’t Get Currency at Home (and Skip Foreign Currency Cards!)

While buying currency at home might seem like a good idea, you’ll end up getting a worse exchange rate. Unless you are 100% sure you’ll need cash right on arrival, avoid exchanging money in your home country. Airports all have ATMs where you can withdraw money. You can get a much better rate when you do that. Don’t get currency before you go.

Additionally, avoid any “foreign currency cards” (like those offered from currency exchange companies) where you can pre-load money at a set exchange rate. The rates given are also terrible and they often have all sorts of additional fees. Doing this basically is trying to predict the exchange rate. You’re hoping it doesn’t get worse when you travel but what if it gets better? You don’t know either way. That’s exactly why you shouldn’t get these cards.

***

Bank fees can add up to some serious money over the course of a long trip. If you want to save money, you need to be proactive when it comes to banking and currency exchanges. A little planning can go a long way and save you a ton of money over the weeks, months, and years of your travels.

I see too many travelers visit the ATM all the time without paying attention to the latest exchange rates. You’re on the losing end of the stick that way. Be smart and bank smart. I haven’t paid a bank fee while traveling the world in over ten years and you shouldn’t either.

And with these simple tips, you’ll never have to again.

WANT MORE? HERE ARE OTHER IMPORTANT TRAVEL TIPS TO HELP YOU SAVE MONEY:

How to Travel the World on $50 a Day

how to travel the world on $50 a dayMy New York Times best-selling paperback guide to world travel will teach you how to master the art of travel save money, get off the beaten path, and have a more local, richer travel experiences. It has everything you need to know about the book

Click here to learn more about the book and get your copy today!


Book Your Trip: Logistical Tips and Tricks

Book Your Flight
Find a cheap flight by using Skyscanner or Momondo. They are my two favorite search engines because they search websites and airlines around the globe so you always know no stone is left unturned.

Book Your Accommodation
You can book your hostel with Hostelworld as they have the largest inventory. If you want to stay somewhere other than a hostel, use Booking.com as they consistently return the cheapest rates for guesthouses and cheap hotels. I use them all the time.

Don’t Forget Travel Insurance
Travel insurance will protect you against illness, injury, theft, and cancellations. It’s comprehensive protection in case anything goes wrong. I never go on a trip without it as I’ve had to use it many times in the past. I’ve been using World Nomads for ten years. My favorite companies that offer the best service and value are:

Looking for the best companies to save money with?
Check out my resource page for the best companies to use when you travel! I list all the ones I use to save money when I travel – and that will save you time and money too!

The post How to Avoid Paying Bank Fees While Traveling appeared first on Nomadic Matt's Travel Site.

ICYMI: Here’s Some New Articles and Interviews!

10 Years a Nomad by Matt Kepnes
Posted: 8/12/2019 | August 12th, 2019

As you know, after eighteen months of writing and editing, my new book, Ten Years a Nomad: A Traveler’s Journey Home, came out last month.

Unlike my previous books, this is not a “how to guide” but a collection of tips, advice, and stories from the road. It a memoir of my ten years backpacking the world and the lessons I learned along the way.

This book gets to the heart of wanderlust and what extended travel around the world can teach us about life, ourselves, and our place in the world. (Or at least tries to.)

It’s meant to show people that if I, a sheltered nerdy kid from a small town, could muster the courage to do this and survive, you can too!

Cheryl Strayed called it inspiring. The Los Angeles Times said, “This book isn’t just for travelers; it’s for anyone who has wanted more and has taken off to find it.” Tony Wheeler, the founder of Lonely Planet, loved it. So did Rolf Potts.

And, more importantly, thousands of readers who keep sending me messages that they couldn’t put it down and it renewed their wanderlust. (For a writer, that’s the best thing we can hear.)

Over the last month, I’ve done a lot of interviews, videos, podcasts, and guest posts talking not only about my book but how you can travel more often – and be a better traveler when you do.

So I wanted to share some of what I’ve been up to so you can learn more about the book and get some travel tips at the same time:
 

Recent Interviews

Here are some interviews that I’ve done on the book, my travels, and my thoughts on being a better traveler:

Go BackpackingTravel Q&A with Matthew Kepnes, Author of Ten Years a Nomad

Expert Vagabond10 Years A Nomad: An Interview With Nomadic Matt

The Broke BackpackerAn Interview With Nomadic Matt

The Daily StoicTen Years A Nomad: An Interview With Matt Kepnes on travel and philosophy

Indie Traveller10 Years A Nomad: A Q&A With Nomadic Matt

NBC NewsHow “Deep Travel” Can Help You Get More Out of Your Next Trip


Podcasts

Love podcasts? I did a lot! Here are some you can download and enjoy on your next plane, commute, or walk:

LandlopersETW #24 Interview with Legendary Traveler Nomadic Matt

The Offbeat LifeHow to travel smarter and create a blogging empire with Matthew Kepnes

Afford AnythingSlow Travel is Cheap Travel With Nomadic Matt

Not a Ballerina Ten Years a Nomad with Nomadic Matt Kepnes – Episode 147 of The Thoughtful Travel Podcast

Zero to TravelTen Years A Nomad With “Nomadic” Matt Kepnes


YouTube Videos

I did two videos with two of my favorite Youtubers:

Hey Nadine10 Lessons learned from 10 Years a Nomad

Kristen and SiyaLife Changing Travel Experiences ft. Nomadic Matt


Book Reviews

On the fence about if you should buy the book? Well, why? It’s great! I poured my heart into it. Come support me! But, more seriously, here’s a bunch of reviews on what people thought:

View from the WingOut Today: Nomadic Matt’s Ten Years on the Road

Women on the Road What Can I Learn From A Travel Blogger Young Enough To Be My Son?

Travel CodexBook Review: “Ten Years a Nomad” by Nomadic Matt

Caroline in the City Ten Years a Nomad: A Traveler’s Journey Home

Travel Writing 2.0Matt Kepnes: Ten Years a Nomad and Making Money on His Own Terms

Travel Writers ExchangeBook Review: Ten Years a Nomad

Life BorderlessTen Years a Nomad: Travel Tips From Matt Kepnes

Go Girl GuidesBook Review: 10 Years a Nomad by Matthew Kepnes

Travel LemmingWant a Long Term Relationship With Travel? Read This First

National Geographic12 Travel Books You Won’t Be Able to Put Down This Summer

BooktribOffice Worker Turned Travel Junkie in “Ten Years a Nomad”

Publishers WeeklyTen Years a Nomad: A Traveler’s Journey Home


New Guest Posts

And, finally, I wrote a bunch of articles about how to be a better traveler – and do it for less money! Check them out here:

One Mile at a Time5 Ways to Get the Most Out of a Destination

Free CandieYou can only “run away” for so long

Helen in Wonderlust12 Travel Tips from Ten Years of Traveling the World

Medium9 Reasons Why Travel Is the Quickest Way to Become a Better Person

Thought Catalog Why ‘Influencers’ Are Bullshit

Newsweek9 Life Lessons I Learned From Being a Nomad For Ten Years

Traveling CanucksMy 10 Favorite Countries from 10 Years as a Nomad

The Travel Women10 Honest Lessons from 10 Years of Solo Travel

TravelFreakWhat I Learned From 10 Years of Travel

Entrepreneur.comHow to Start (and Run) a 7-Figure Business While Traveling the World

The Daily BeastWhy Backpackers are Good at Saying Goodbye

Medium.comThe Challenges of Writing A Memoir


The “Ten Years a Nomad” Book Tour

I’m finishing up my book tour and there are still a few more destinations left. Come join me, talk travel, get a signed book, and hang out!

August 14 Portland, OR: Powell’s Books at Cedar Hills Crossing @ 7:00pm EVENT DETAILS
August 15 San Francisco, CA: Book Passage at Corte Madera @ 7pm EVENT DETAILS
August 16 Seattle, WA: Third Place Books @ 6pm EVENT DETAILS
August 19 Vancouver, BC: Indigo (Robson) @ 7:00pm EVENT DETAILS
August 26 Toronto, ON: Indigo (Bay-Bloor)@ 7:00pm EVENT DETAILS
August 31 Montreal, QC: Indigo (Place Montreal) @ 1:00pm EVENT DETAILS

****

Thank you so much for your support and love over the years. I really hope you love this book. I wanted to write something that would appeal to a wider range of readers. Please help spread the word, get a copy, and I hope to see you on the book tour.

– Nomadic Matt

Here are links to buy the new book:

An amazon blue purchase button A blue Barnes and Noble purchase button
 

Book Your Trip: Logistical Tips and Tricks

Book Your Flight
Find a cheap flight by using Skyscanner or Momondo. They are my two favorite search engines because they search websites and airlines around the globe so you always know no stone is left unturned.

Book Your Accommodation
You can book your hostel with Hostelworld as they have the largest inventory. If you want to stay somewhere other than a hostel, use Booking.com as they consistently return the cheapest rates for guesthouses and cheap hotels. I use them all the time.

Don’t Forget Travel Insurance
Travel insurance will protect you against illness, injury, theft, and cancellations. It’s comprehensive protection in case anything goes wrong. I never go on a trip without it as I’ve had to use it many times in the past. I’ve been using World Nomads for ten years. My favorite companies that offer the best service and value are:

Looking for the best companies to save money with?
Check out my resource page for the best companies to use when you travel! I list all the ones I use to save money when I travel – and that will save you time and money too!

The post ICYMI: Here’s Some New Articles and Interviews! appeared first on Nomadic Matt's Travel Site.