The Best Travel Insurance Companies for Backpackers

A budget backpacker sitting on a mountain looking into the distance
Posted: 6/16/2019 | June 17th, 2019

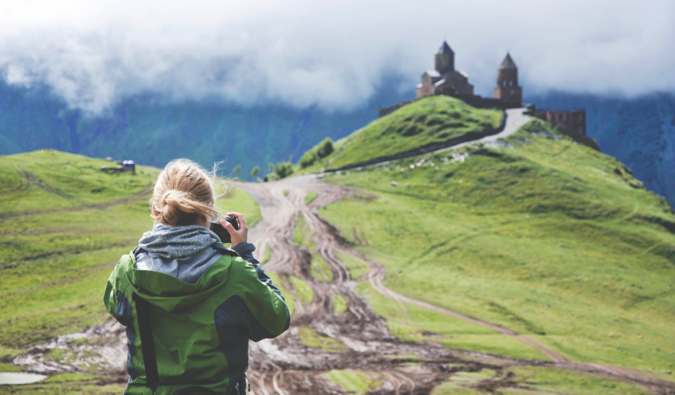
I’m a backpacker at heart. Even after traveling the world for over a decade, I still love to travel cheap, prioritizing experiences over fancy accommodation and transportation. I still love staying at hostels, meeting locals, and sampling as many local delicacies as I can.

Contrary to popular belief, being a backpacker is not about pinching every penny — it’s about finding value. If you want to have a genuine and authentic trip without breaking the bank you need to spend your money wisely.

And when it comes to backpacking around the world, one of the wisest choices you can make is to purchase travel insurance.

I know, travel insurance seems like just another expense that will chip away at your budget. I used to think that too.

But it also has the potential to save you thousands of dollars should something go wrong on your trip.

And after traveling around the world for the past 10 years, I can confidently tell you this: things will go wrong.

To help you stay safe on your next trip, here is everything you need to know about buying insurance as a backpacker.

Why Do Backpackers Need Insurance?

The reason you need to buy travel insurance is because accidents happen. Regardless of whether you’re at home or abroad, things go wrong. At home, you likely have access to medical care and reliable medical facilities.

On the road, that isn’t always the case.

While serious injuries are rare, they do happen. And it’s always better to be safe than sorry. But insurance isn’t just for medical emergencies. It also covers a lot of incidents that are much more common than you think!

Here’s a quick overview of what you can expect your backpacker insurance to cover:

  • Medical emergencies (surgery hospitalization fees, medical evacuation)
  • Flight delays and cancellations
  • Trip cancellations (due to injury or a death in the family)
  • Emergency evacuation (due to injury or natural disaster)
  • Dental emergencies
  • Lost or stolen baggage
  • Damaged or stolen gear
  • Death overseas

While it’s unpleasant to spend time dwelling on these things, the truth is, you need to be prepared for the worst. Hopefully, you’ll never need to use your insurance plan, but if you need to, you want to make sure you have the coverage you need.

I’ve had my bags stolen, I’ve needed to go to the hospital overseas, and I was even stabbed while traveling in South America.

I didn’t plan for any of these things to happen, but when they did, I was glad I had insurance to help me get reimbursed as well as to help me navigate the confusion that comes with having an emergency abroad.

I know, as a backpacker you like to keep costs low. Insurance isn’t free, after all, which makes it seem like a burdensome and unnecessary expense.

But it’s much better to pay a few bucks a day than risk losing your life savings should an emergency occur while you don’t have coverage.

What Does Travel Insurance NOT Cover?

While most travel emergencies and injuries are covered by travel insurance, it’s important to know what is not covered by your plan. Knowledge is power, after all.
For reference, most backpacker insurance policies do not cover:

  • Accidents sustained while participating in extreme adventure activities. These often include hang-gliding, paragliding, or bungee jumping.
  • Alcohol- and drug-related incidents.
  • Carelessness or negligence.
  • Pre-existing conditions or general check-ups.
  • Stolen cash (unless you pay for a more comprehensive plan)
  • If civil unrest makes your destination unsafe but your government hasn’t called for an evacuation, you probably won’t qualify for evacuation (unless you have more advanced coverage from a company like Medjet).
  • Changing your mind about your trip or unfriending or breaking up with your travel partner will disqualify you from trip-cancellation coverage.
  • Pre-existing medical conditions don’t qualify for most trip cancellation plans unless otherwise stipulated.
  • If your visa to a destination is refused you won’t be reimbursed if you decide to cancel your trip.

The Best 3 Backpacker Insurance Companies

To help you stay safe on your next trip, here are some suggested companies that provide affordable insurance for backpackers:

1. STA Travel Insurance
STA is an online travel agency that is known for their flights and travel packages — but they offer affordable travel insurance too for students as well.

STA sells basic, budget-friendly coverage for students and teachers who travel, with plans starting as low as $99 USD for 1 year. If you’re a student and a budget backpacker who is only looking for the most basic of coverage, STA is the company for you.

Here’s a quick overview of STA Travel Insurance:

  • Budget-friendly plans
  • ISIC card benefits in over 125,000 locations
  • Basic coverage options
  • Great for students/shoestring backpackers.

Click here to get a quote from STA.

2. Insure My Trip
Insure My Trip helps you compare insurance plans and prices so you can purchase the plan that’s best for you and your budget. You can compare plans from almost 30 different insurance providers, with plenty of budget-friendly options available for backpackers.

And they are the go-to company for older backpackers as well since many travel insurance companies won’t cover travelers over 65. Insure My Trip provides comparisons from insurance companies that cover older travelers, making them the best option for retirees and other senior adventurers.

Here’s a quick overview of Insure My Trip:

  • Guaranteed low prices
  • Coverage for senior travelers over 65
  • “Anytime advocates” ask the insurer to give your claim a second look if you think it was unfairly denied.

Click here to get a quote from Insure My Trip

OUR TOP PICK: World Nomads Travel Insurance
World Nomads is the absolute best insurance company for budget travelers. I’ve been using them for over a decae and have never been disappointed with their customer service or coverage. Their plans are comprehensive and great for both long-term travelers as well as anyone heading out on a shorter vacation. It’s easy to read (and understand) their policies and see what’s covered — and what isn’t.
Best of all, if you want to learn more before you purchase or have questions after you sign up, their customer support is there to help.

World Nomads is perfect for adventurous backpackers who plan to do activities like hiking, kayaking, or even some extreme sports like bungee jumping or rock climbing. With 100 different activities covered, World Nomads is the best choice for the active backpacker.

To help you learn more about World Nomads, here’s a quick overview of their coverage:

  • Emergency medical and dental coverage
  • Coverage for trip cancelations, delays, and interruptions
  • Baggage protection
  • Emergency evacuation (for medical emergencies and non-medical emergencies such as natural disasters)
  • Medical transportation
  • 24/7 customer assistance

World Nomads was founded by backpackers so they know exactly what the budget traveler needs in their plan. This is my go-to insurance company and one I’ve been using for years. If it sounds like the company for you, you can use the widget below to get a quote:

(Want to learn more? Check out my comprehensive World Nomads review!)

***

After backpacking around the world for over a decade, I never leave home without travel insurance. I’ve experienced first-hand how helpful it can be. It’s saved me thousands of dollars over the years — as well as countless headaches too.

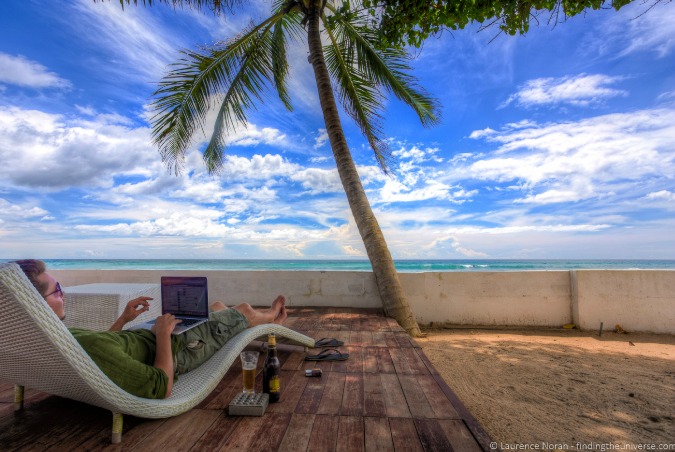
Not only that, but buying travel insurance provides peace of mind. It gives you and your family a safety net in case things go wrong. Whether you’re island-hopping in Thailand or getting off the beaten path in Eastern Europe, travel insurance will be there when you need it.

Being a backpacker is all about having amazing, memorable travel experiences all without breaking the bank. And there’s no better way to insulate yourself from expensive (and unnecessary) costs than by buying travel insurance.

Book Your Trip: Logistical Tips and Tricks

Book Your Flight
Find a cheap flight by using Skyscanner or Momondo. They are my two favorite search engines because they search websites and airlines around the globe so you always know no stone is left unturned.

Book Your Accommodation
You can book your hostel with Hostelworld as they have the largest inventory. If you want to stay somewhere other than a hostel, use Booking.com as they consistently return the cheapest rates for guesthouses and cheap hotels. I use them all the time.

Don’t Forget Travel Insurance
Travel insurance will protect you against illness, injury, theft, and cancellations. It’s comprehensive protection in case anything goes wrong. I never go on a trip without it as I’ve had to use it many times in the past. I’ve been using World Nomads for ten years. My favorite companies that offer the best service and value are:

Looking for the best companies to save money with?
Check out my resource page for the best companies to use when you travel! I list all the ones I use to save money when I travel – and that will save you time and money too!

The post The Best Travel Insurance Companies for Backpackers appeared first on Nomadic Matt's Travel Site.

9 Ways to Become a Successful Travel Blogger

blogger blogging successfully
Updated: 12/27/18 | December 27th, 2018

I don’t write articles about how to be successful at blogging often because this is a consumer travel website not a blogging website, but I’ve seen a lot of articles on travel blogging lately, which have many points I disagree with and I think offer a lot bad advice.

As someone who has been blogging for over ten years, I want to offer a counterbalance to some of the prevailing (and wrong) wisdom out there on how to succeed.

(Especially in light of that Instagrammer selling a scam course on how to grow your following!)

Travel blogging is a crowded field — and it gets more crowded by the day. After all, the idea of “getting paid to travel the world” seems like an amazing thing to try to do. You get to visit wonderful places around the world on someone else’s dime!

It’s a dream job, right?

Well, first, running a successful travel blog – or any blog in any industry – is hard work and time-consuming. Putting posts up is not going to result in money falling like rain (though judging by some of the people I’ve seen on paid trips, it can at least amount to a drizzle). You have to work for it.

Blogging takes persistence.

Unless you hit the Internet “viral” lottery, you should expect to plug away for a least a year before you start to see sustainable income coming in.

Building a blog is like building any other business: success takes time, patience, and dedication.

Think of travel blogging like the restaurant business: Just because there are a lot of restaurants doesn’t mean that they are all good or that you shouldn’t open one of your own! Instead, people who open a restaurant or desire to be a world-class chef look around and say, “I can do this better.” That’s the mindset you should have about your travel blog.

Take a look around and go “I can do this better!”

Just because someone can travel and write doesn’t mean they can write well or become a good travel writer. No, most travel blogs are terrible so don’t worry about the number of blogs out there. Worry about the quality of blogs out there.

It’s not a crowded field when you look at it that way.

Here are nine things you can do to succeed in travel blogging (or any blogging field, really) and jump ahead of the crowd. Doing them will make you far more successful than most of the bloggers out there.

1. Read a Lot of Books

I am always shocked at how few travel bloggers develop their skills by reading. Very few read any marketing, strategy, business, or self-development books. Running a blog is like running a business, and if you don’t go to “school” and constantly learn, you’re going to fall behind. Every successful person I know is a voracious reader. They constantly try to improve their skills and knowledge. You must always be a student. You must always learn.

After all, why reinvent the wheel?

Read what experts have to say, learn what works, and apply the tips you pick up to your blog. If someone has been there and done that, why try to learn that through trial and constant error? Read the best way to do it… and do it! I read a lot besides travel books. I consume marketing books, management, writing, history books, and biographies. Even if you only get one idea from the book, that book was worth it. I read at least one book a week and am often reading multiple books at a time. Travel, history, business, fiction — I consume it all.

If you only do one thing from this list, make it this one.

Some of my must-reads are:

If you do only one thing from this list, make reading more it!

2. Be Like Apple — Think Different

Whatever you are going to write about, try to present that subject in a way that hasn’t been done before. If everyone is sharing sponsored content, don’t. If everyone is writing text, make a video. If everyone is serious, be funny. If everyone has complex designs, go simple and visual. If everyone is doing one-off blog posts, create a story through a series of posts that keep people coming back for more.

Always innovate — do something different and unique.

One thing we do here that makes us different is that we put (what I think) a level of detail into our posts that no one else does. We make our posts the ultimate guides on destinations. We add photos, charts, and maps when we can. We add video. Contact information. We want you to come here over and over again because our resources are the best. Many bloggers just provide a light dusting of information. We go deep.

3. Invest in Your Blog

For a long time, I avoided spending any money on this website. I bootstrapped everything and viewed every expense negatively. “That designer would be nice but I can’t afford it. I’ll just create a crappier design myself.”

But I soon realized money spent wisely is an investment.

Now I pay for designers, SEO auditors, conferences, video and audio editors, copy editors, and much more. This allows me to improve the reader experience, develop useful products, work on other projects, and free up time to write. I focus on my core competencies and hire the rest out.

It’s easy to say, “Oh, that conference is too much. I don’t want to spend that much.” But if that conference results in one strong business connection that leads to new sales or a guest posting opportunity, then the conference is worth it. (See below for some good conferences to attend.)

Businesses invest in themselves — and you need to do the same.

It can be easy for me to say now, but even when you start, spending a little bit of money can go a long way. I didn’t start out hiring lots of people. I hired one person, then another, then another. Even if you spend a few hundred dollars on snazzier banners, that can go a long way to improving your readers’ experience.

4. Be Niche

Back when I started blogging in 2008, it was easy to maintain a general budget travel website. You could cover a wide range of travel topics and face little competition. There was only a handful of bloggers. Now, there are too many long-established blogs and websites to do that. (And you’d also be way behind in Google search results.)

I recommend being as narrow and focused in your topic(s) as possible. Whether it’s RV travel, Turkey, Thailand, NYC, or your small town, the power of search lets everyone define their niche and still be able to reach millions of potential readers. In fact, being niche now is better than trying to be a more general resource site like mine.

Moreover, focusing lets you become an expert. You can be the person to whom readers always turn for information on this subject or that destination, which allows you to cultivate a bigger presence online.

Don’t try to be everything to everyone. Go narrow. Go deep.

5. Create Products

Businesses sell something — and so should you. Whether it’s a course, a book, t-shirts, tours, or just other people’s products via affiliate marketing, give your audience an opportunity to support your website. Offering products for sale allows you to be independent from sponsors and brand deals and not compete with other travel bloggers for spots on press trips (see below). It allows you to scale your website and your revenue. Many products offer value to your readers by going more in-depth and in detail than a blog post usually allows.

There are very few travel bloggers that produce products. Most of the time, travel bloggers end up making money by creating sponsored content and getting paid to go on trips. That’s cool if that is something you want to do, but that is time-consuming and requires you to be constantly working (and it’s soul-sucking). You never have time to relax or do something for yourself. It’s not a hamster wheel you want to be tied to.

Products allow you to create something once and earn revenue while sleeping, sightseeing, or getting a suntan on a beach! They give you ownership of your income and a chance for your readers to buy something from you and give back!

Trust me. Your readers want to support your hard effort. You just need to give them a way.

6. Don’t Take a Lot of Press Trips or “Work with Brands”

Why do people still buy guidebooks? Because they want an independent opinion on destinations. If everything you write is sponsored by someone, you’ll hit a limit to your number of readers. Sure, some people won’t care and will follow your adventures no matter what, but a larger majority of people will feel that you can’t relate to their experience and will seek to find information elsewhere.

Consumers want relatable and independent travel content because they want to learn that they can make it happen too. (Just look at the comments on this post if you don’t believe me!) If you’re in fashion, you can showcase all the makeup you want because a reader can look at that and think, “Yeah, I can do that too! To the mall I go!” But when you’re talking travel, people can’t look at your free, multi-thousand-dollar trip to the Maldives and say, “Yeah, that’s realistic for me too! To Expedia I go!”

Think about it. When you see someone having a $10,000 holiday, how do you feel? Do you think “Wow! That’s pretty!” or “Wow! I can do that too! I’m going to book that!?”

Sponsored trips, blog posts, and one off brand deals will help you travel and provide eye candy for your readers but it won’t create the expertise and relatable experiences that will have them coming back to you over and over for concrete advice or product purchases.

I’ve yet to see a pure travel blog get huge by only taking sponsored trips (though there are a number of fashion/travel hybrid blogs that are gigantic). The most successful bloggers in many niches avoid one-off partnerships and sponsored content because it dilutes their authenticity. (On the other hand, long-term partnerships are wonderful as they can bring value and unique deals to your readers.)

Avoid too many one-off trips paid by someone else, write about relatable experiences, and grow larger!

(And when you create products, you don’t need the money from these trips! Win-win!)

7. Network Outside of Travel

Networking with other travel bloggers can help you become better known in the industry (which is a good thing), but by reaching outside of the industry, you can be the travel person everyone else turns to for quotes, interviews, and advice.

And that is going to pay more dividends than just sticking to travel conferences. Yes, attend industry events (you’d be stupid not to!) but don’t attend only industry events.

Find where your expertise overlaps with other industries and meet the successful leaders in those industries. Then you can find people who know nothing about travel and be their travel expert on their websites. It’s how I’ve connected with so many finance, entrepreneurship, and tech experts. Here are some good conferences to attend:

8. Stop Talking About Yourself

While running a blog means you are going to say “I” a lot more than in magazine or newspaper writing, that doesn’t mean you should write only about yourself. If your blog is solely a journal or trip down memory lane, write about anything you want. But if you’re looking to run a professional blog that creates a sustainable business, remember that it’s not all about you.

It is – and always will be – about the people reading your website.

Whether that is by providing practical advice, telling them a good story, or making them laugh, remember that it’s all about how you can be in service to them.

If you are going to write about yourself, do so sparingly or relate it to the bigger picture of travel on the road. Don’t write about your new shoes, what food you ate, your thoughts on whatever, or the mundane details about your life. Few people really care about that. We read writers because they connect with us on an emotional level, tell good stories, and allow us to visualize ourselves in the places they talk about it.

Far too many travel blogs are a glorified personal diary but the most successful ones tell stories of places and better their reader’s travel experience!

9. Be Persistent

Rome wasn’t built in a day — and your blog won’t build itself overnight either. Maintain realistic expectations about your blog. Don’t expect anything but hard work for the first year. Don’t rush. Build something that will last. The light is always at the end of the tunnel, but too many people give up right before the end.

Go back to my early posts from 2008 — they are horrible. I mean god-awful. There is a big difference between the content I produced then and the content I produce now. Sucking — at first — is part of the journey. You aren’t going to be great out of the gate.

And a lot of bloggers, expecting instant fame and success, give up. I have tons of people go “Hey, can I get a refund on my course? I just don’t have the time right now. I’ll come back to it later.” They never do. I see it all the time. The reason most bloggers fail is not because they have bad content but because they give up. They don’t want to put in the time to succeed. Part of success is just outlasting everyone else.

Be patient. Put in the time. And you’ll reach your goals!

****
Creating a travel blog is a time-consuming process. Writing about your trip to Paris is only a small part of the story. Successful blogs focus on content and are customer-centered and reader-centered. It’s easy to reach small or mid-tier status but if you want to stand out, focus on reader-centric content, being niche, creating products, and sticking to best practices.

If you follow my nine times, I promise you’ll find success in the travel blogging industry. These are my nine guiding principles and they’ve served me well over the last decade!


P.S. – If you’re looking for more in-depth advice, I run a blogging course that gives you a behind the scenes look at how I run this website. You’ll get expert interviews, monthly webinars, FREE tech support and help with setting up your website, and one on one time with me! If you’re interested, click here to get started now.

The post 9 Ways to Become a Successful Travel Blogger appeared first on Nomadic Matt's Travel Site.

7 Editing Tips to Improve Your Travel Photographs

Blue pink photo of lightning at dusk
Updated: 12/09/2018 | December 9th, 2018

Today, professional photographer Laurence Norah of Finding the Universe, finishes his five-part series on taking better travel photos. In part five, Laurence is giving some simple post-processing techniques that you can use to make your travel photos wow your friends and family! Editing your photos is just as important as how you compose them, so I hope you’re ready to take some notes!

One of the most misunderstood parts of digital photography is what happens after you take the shot: editing your photos, aka post-processing. This is where you edit the images you have taken, to create the final product.

Post-processing is the equivalent of the darkroom from the days we shot in film.

In today’s post, we’re going to be covering some ideas for editing your photos, from the basics (cropping and leveling), through to more complicated actions like recovering shadow and highlight information.

Editing Photos: 7 Editing Tips for Your Travel Photos

1. How to Crop Your photos
The crop tool allows you to change the size of your image, and also to change the aspect ratio. For example, you can crop an image from a rectangular shape to a square shape. There are many reasons you would want to crop, including for publishing in different formats and aspect ratios.

Let’s take a look at the first photo from this post, a lightning shot I took on a recent trip to the Florida Keys. Here’s the original version without cropping:

Blue dark pink nature photo of lightning at dusk

And the edited version, post-crop:

Blue pink photo of lightning cropped

Compared to the original, I have cropped the image to remove the dark part of the pier on the right-hand side of the image and recomposed using the rule of thirds, so I have one-third land and two-thirds sky. This makes the lightning bolt more the focus of the shot.

You might wonder why I didn’t just compose properly when taking the shot. Well, in this case, I was doing a long-exposure shot without a tripod, so had the camera balanced on the edge of the pier for stability. That very much limited my ability to perfectly frame the moment, so I just shot wider, knowing I’d be able to crop the shot appropriately after the fact.

Let’s look at what cropping looks inside a couple of the tools available.

Here’s an example of cropping in Snapseed:

Blue pink nature photograph of lightning cropping mask Snapseed

And the same thing in Lightroom:

Blue dark pink photo of lightning lightroom cropping mask Lightroom

In both cases, cropping is very simple: it just involves you selecting the crop tool and then selecting the area you want to keep with your mouse or finger. Then you apply the changes, and voilà, your new cropped image is ready to go.

As you see from this and later examples, the tools look similar across different platforms, so it’s easy to apply the learning you have from one tool to another.

2. How to Level Your Travel Photos
One of my personal petty annoyances in photography is when the horizon line in a photo isn’t level. Sometimes when we’re caught up in the moment, this basic compositional rule is forgotten — but the good news is that editing your photos to make them level is also very easy.

I’ll use the lightning shot as my example again. Balancing the camera on the edge of the pier meant that the shot wasn’t level — this is particularly noticeable to the eye when the image has a clearly defined horizon line, such as the sea.

If we look at a zoomed in version of the image in its original form, with a line overlaid near the horizon, we can see that it’s not level — the line is closer to the horizon on the right-hand side than the left.

Blue pink nature picture of lightning at dusk leveling mask

In Lightroom, the level tool is part of the crop tool, and you can just rotate the image to suit. When you use the level tool, a grid will appear to help you get the alignment correct. Here’s a screenshot of that in action in Lightroom.

Blue pink nature photo of lightning straightening mask Lightroom

And here’s the same procedure in Snapseed, where the level tool is called “Rotate”:

Blue pink nature photo of lightning rotate feature snapseed

Leveling an image is a really simple task that will take just a few seconds of your time, resulting in a much more visually pleasing image.

3. Vignetting Your Photos
Vignetting is about making parts of the image darker or lighter than other parts, in order to make it clearer what the subject of the shot is.

Some tools restrict your vignette to the corners, but in applications like Snapseed and Lightroom you can selectively darken and lighten areas of the image — you don’t need to restrict yourself to the corners.

Taking the lightning shot above, let’s load up the vignette tool in Snapseed.

Blue pink nature photo of lightning outer brightness vignette

Here we have options for how big to make the “center size,” i.e., the area to be edited. Inside this area, everything can be made brighter (inner brightness) and everything outside the area can be made darker (outer brightness). We can also do it in reverse, making the inner darker and the outer brighter.

Let’s apply the vignette tool to the lightning bolt, to give you an idea of the effect:

Blue pink nature photo of lightning inner brightness vignette

Above are the settings I chose for outer brightness and inner brightness, while below is the size of the vignette itself, which is based on the center size setting.

Blue pink nature photo of lightning vignette center point

Vignetting is particularly good for portraits, and anywhere where you really want to make the subject of the image more clearly obvious to the viewer.

4. How Change Shadows and Highlights in Your Photos
Sometimes when we take a photograph, parts of the shot might end up being darker or brighter than we want. We refer to the dark areas of the shot as shadows, and the bright areas of the shot as highlights.

We can fix this by changing the brightness of the shadow and highlight areas specifically, using either the “Shadow” or “Highlight” tool. This is a tool that works particularly well on RAW files as they retain more information on the shadow and highlight areas of an image compared to a compressed JPG, which discards most of this information in order to save file size.

Let’s take a quick look at adjusting shadows and highlights using Lightroom. In Snapseed, shadow and highlight adjustment can be found under the “Tune Image” setting.

Here’s a shot of a couple enjoying a bonfire and fireworks display in Edinburgh during Hogmanay:

Contrast tutorial with fireworks at hogmanay in Lightroom - before

As you can see, the fireworks and bonfire are clearly visible, as are the torches the couple is holding, but the rest of the shot is dark. Let’s adjust the settings and see what we can get.

Contrast tutorial with fireworks at hogmanay in Lightroom - after

In this version of the image, the couple is much more visible, as is the hill the fireworks are on and the surrounding crowd.

To achieve this I increased the overall exposure of the image, making the whole image brighter, including the shadows and the highlights.

Then, as the shadow areas were still a little dark, I increased those a little more.

Finally, as the global exposure adjustment made the fireworks and bonfire too bright, I reduced the highlights a little bit to give the final result.

Shadow and highlight adjustment is useful in a wide range of scenarios to help balance the image out — bringing overexposed areas down in brightness, and helping to boost the shadows. Just be aware that a light touch is recommended — increasing the brightness of the shadows too much can result in a lot of noise being revealed, which might look unnaturally green or purple.

5. How to Adjust the Contrast
Contrast is about accentuating the difference between the light and dark parts of the image. Increasing the contrast of an image can dramatically improve the visual impact that has, by making the boundaries between those light and dark parts clearer.

Let’s take a look at a shot of people jumping against the sunset in the Sahara, for example, which I’ll be editing in Snapseed.

Girls jumping on sand dunes - original photo

There is nothing too wrong with this shot, but it lacks the visual impact that I wanted. Ideally, I would want the shapes of the people to be in full silhouette against the sun, but as it was shot the camera picked up some skin tones and clothing color.

Using the contrast tool, we can make the dark areas stand out against the bright areas.

Girls jumping on sand dunes - contract tutorial photo

And here’s the result:

Girls jumping on sand dunes - after photo

As you can see, this made the jumping figures and the dune more silhouetted against the sky. In most shots, you only want to tweak the contrast a little bit to get the desired effect, normally no more than +20 or so, but in this case, the higher number gave the best result.

6. How to Adjust Colors
Color adjustment is another important piece of the editing toolkit. We can adjust image color in all sorts of ways, from changing the overall “warmth” of the image (how blue or yellow it appears), to individually changing the hue and saturation of specific colors inside an image.

For this post, though, I just want to cover some very simple color changes you can use to make your images just a little more visually impactful.

The fastest way to adjust an image’s color is with the “Saturation” tool. This changes the appearance of every color in an image to make it more or less saturated. We can use the saturation tool to desaturate an image, eventually resulting in a black-and-white image with no color:

Photo of orange building and waterfall - black and white - desaturated

Or we can go all the way to the other end of the spectrum, and make the color incredibly saturated:

Photo of orange building and waterfall - neon - saturated

As with many edits, the key is to find a good balance — oversaturated images tend to look rather unnatural. Desaturated images can be very effective, and of course black-and-white is an excellent choice for all sorts of situations, in particular, portraits, architecture, and certain landscape scenes. But generally you would want to find a happy midpoint: not too oversaturated and not too undersaturated.

Photo of orante building and waterfall - normal

Saturation is adjusted on a sliding scale and is on the basic adjustments panel in Lightroom or the “Tune Image” option in Snapseed.

7. Blemish correction
The last area I’m going to touch on today is blemish correction, or “image healing.” Sometimes there will be something in an image that you really don’t want to be there, like an inconvenient pimple on someone’s face. This is easy to remove in all the major editing tools.

You can, in theory, remove any object from a scene, but the healing tool works best on distinct, small objects that are surrounded by uniform colors. This is because the heal tool has to replace the area you wish to remove with something else, and this works best when it has an area nearby that looks similar. So for example, a pimple on a face is surrounded by a lot of similarly colored skin, so the heal tool can easily calculate what to replace the pimple with based on the surrounding area.

For this example, I’m going to show how Snapseed can be used to replace an object in a scene. Here’s a group of people sitting on a sand dune in the Sahara:

People sitting on a sand dune in Lightroom 1

Let’s say for some reason I only wanted to have people sitting in my shot, and I need to remove the standing person. She is a good candidate for removal as she is separate from the rest, and the surrounding scenery is not too complicated.

In Snapseed, we load up the healing tool, then we zoom in on the object to be removed with the standard “pinch to zoom” gesture.

People sitting on a sand dune in Lightroom 2

Next, we use our finger to draw the area to be removed. It’s important to be as precise as possible because the tool is most accurate with small objects.

People sitting on a sand dune in Lightroom 3

Once we have drawn the area, Snapseed will edit it out, replacing it with the best guess of what is behind the object.

People sitting on a sand dune in Lightroom 4

As you can see, the result is impressive, with no real evidence that there was anyone standing there at all.

The healing tool is perfect for all manner of fixes, from editing out unwanted background strangers in your shot, to removing skin blemishes in portraits or power lines in landscape shots.

Best Photography Editing Software

Here is a list of the best editing tools out there:

  • Adobe Lightroom (PC or Mac)Lightroom is the industry standard tool for photography professionals. But this post is not going to focus on Lightroom, nor cover everything you can do in Lightroom, as it’s a massively complex tool, covering both photo management and photo editing.
  • iPhoto (Mac) – I list iPhoto here mainly because it’s a commonly used tool among Apple users. However, I personally never recommend using it. While it will let you do everything that I cover in this post and is better than nothing, the way it manages your photos makes it hard to migrate to a more sophisticated system further down the line if you choose to do so.
  • Picasa (PC or Mac)Picasa is a free desktop photo editing application from Google. It’s very simple, but it allows you to do everything I’m going to cover in today’s post. If Lightroom is a bit overwhelming, Picasa is a great, free place to start.
  • Snapseed (iOS or Android) – Another free Google tool, Snapseed is the best mobile image-editing app for both iOS and Android. It’s an incredibly powerful tool that, while simple to start using, has a great many features that take time to fully master. I use it for 95% of my mobile editing needs.

Let’s take a look now at what you can and should be using these tools for with your images.

***

Editing your photos is a crucial step that far too many people skip. As you can see from this lesson, there is much more to editing your photos than just picking a filter and posting your picture on Instagram. By incorporating some of these tips and techniques into your post-processing routine you’ll be able to improve your travel photography in leaps and bounds.

So get out there and start taking pictures!

Laurence started his journey in June 2009 after quitting the corporate life and looking for a change of scenery. His blog, Finding the Universe, catalogs his experiences and is a wonderful resource for photography advice! You can also find him on FacebookInstagram, and Twitter.

Travel Photography: Learn More Tips

For more helpful travel photography tips, be sure to check out the rest of Laurence’s travel photography series:

LEARN TO GET OUT OF AUTO!

capture the world photography courseIf you are looking to really get into photography and want to master your camera and take amazing photos when you travel, Laurence and I have developed a comprehensive photography course that will get you out of auto and have your friends go “Wow! That’s really breathtaking!” in no time. Click here to learn more about the course and start today!

Book Your Trip: Logistical Tips and Tricks

Book Your Flight
Find a cheap flight by using Skyscanner or Momondo. They are my two favorite search engines because they search websites and airlines around the globe so you always know no stone is left unturned.

Book Your Accommodation
You can book your hostel with Hostelworld. If you want to stay elsewhere, use Booking.com as they consistently return the cheapest rates for guesthouses and cheap hotels. I use them all the time.

Don’t Forget Travel Insurance
Travel insurance will protect you against illness, injury, theft, and cancellations. It’s comprehensive protection in case anything goes wrong. I never go on a trip without it as I’ve had to use it many times in the past. I’ve been using World Nomads for ten years. My favorite companies that offer the best service and value are:

Looking for the best companies to save money with?
Check out my resource page for the best companies to use when you travel! I list all the ones I use to save money when I travel – and I think will help you too!

The post 7 Editing Tips to Improve Your Travel Photographs appeared first on Nomadic Matt's Travel Site.

Camera Gear: The Travel Cameras and Accessories to Buy

Photographer and gear set up near the ocean
Updated: 12/2/2018 | December 2nd, 2018

Today, professional photographer Laurence Norah of Finding the Universe, continues his five-part series on taking better travel photos. Many of you are looking to improve your travel photography so Laurence is here to help us do just that. In this post, Laurence goes in-depth on how to pick the perfect travel camera and gear for your trip.

There is a belief that better photography gear will equate to better photographs. While this is certainly the case in specific situations, the reality is that it is the skill of the photographer that makes all the difference. A pro-level camera in inexperienced hands will likely result in worse photographs than those taken by someone using an iPhone.

Knowing how to compose a great photo and how to use your camera properly are the two most important parts of taking a great photo, with the camera gear itself coming next in importance after these two.

Sometimes, gear does make a difference, particularly for situations such as fast-moving subjects or when there is less light available, in which case you might need a camera with a bigger sensor or a lens with a wider aperture. This is why you often see sports or wedding photographers carrying such expensive-looking equipment. But for your average travel photograph, the gear isn’t going to be the definitive factor. Rather, it’s important to get the right gear for you, your budget, and your skill level.

How much money do you want to spend?

Camera and tripod set up in front of a mountain and nature
There’s no point spending time looking at gear that isn’t in your budget. Set yourself a budget before you begin, and don’t forget to factor in lenses, memory cards, spare batteries, filters, and other accessories.

There is a law of diminishing returns, with a sweet spot currently of around $500–1,000 USD for a solid setup that will do everything you need.

Consider these price guidelines for all the equipment you’ll need:

  • Budget: $150–300 USD
  • Value: $300–500 USD
  • Mid-range: $500–1,000 USD
  • High-end: $1,000+ USD

How much gear are you willing to carry?

Tripod and camera set up on a natural beach overseas
Weight is a serious consideration, and you have to be brutally honest with yourself about what you are willing to carry with you. I’ve often met people taking pictures with their smartphone who say they have a nice expensive DSLR sitting back in their hotel room that was “too heavy to bring out today.”

If you’re not the kind of person who wants to carry a heavy device, then don’t buy one in the first place. The best camera is always the one you have on you, so if you think you’re going to mostly just be keeping it light, then just invest in a decent smartphone or simple point-and-shoot.

For reference, your smartphone probably weighs around 6 oz., a point-and-shoot 8 oz., a mirrorless system with a lens around 16 oz., and a full DSLR system around 30 oz. or more.

The heavier the equipment, the higher the quality of construction, particularly of the optical elements, leading to higher-quality images. However, unless you are planning on selling your work for high-resolution printing, the difference probably won’t be noticeable.

This is another moment to be honest with yourself. Learning how to use a camera properly takes time, and if you don’t want to do that, then don’t invest in an overly expensive or complicated camera.

I’ve seen people with rigs costing in excess of $5,000 USD, shooting away in auto mode and wondering why the folks with the iPhones are getting better results. More expensive gear does not automatically equate to better photos!

There’s no exact science to figuring out how difficult a camera is to use, but difficulty indicators include costing more, having more buttons, and having a massive manual. The more complicated the camera, the more control that you have, but the harder it will be to achieve good results without investing time and effort into learning.

11 Best Cameras for Travel

The main difference between camera types is the size of the sensor inside the camera — the larger the sensor, the better the camera will perform in lower light, and the bulkier and more expensive it will be.

The following list is roughly ordered by sensor size, from small (smartphones) to larger (SLRs).

  1. Google Pixel 2: I’ve used a lot of Android phones over the years, and Google’s Pixel 2 is a beast when it comes to mobile photography. It offers full manual control, a super f/1.8 aperture lens, the option to shoot in RAW file format, optical image stabilization, and even pretty good performance in low light.(Smartphone, $629
  2. iPhone X: I’ve never personally used an iPhone, but they are often lauded by friends as being superb for photography, with each iteration improving on the last. If you’re an Apple fan, you’ve probably already got one though. (Smartphone, $1,050)
  3. Sony RX 100 V: While this is by no means a cheap point-and-shoot, it is generally reviewed as the best in its class. This is due to having a much larger sensor than other models, meaning that the image quality is a lot better. If price is an issue, check out previous versions which come in a bit cheaper. (Point and shoot, $895)
  4. Canon Powershot Elph 190 IS: At the other end of the scale is this $100 USD point-and-shoot from Panasonic. It’ll get the job done, offers a 12x optical zoom, and will slip nicely into your pocket. Don’t expect National Geographic–quality shots though. (Point and shoot, $150)
  5. Canon Powershot G9X Mark II: Though it sits between the above two options in price, the G9 X Mark II comes a lot closer to the Sony in terms of image quality. Excellent battery life, rugged construction, and Wi-Fi round out the feature set. (Point and shoot, $430)
  6. GoPro Hero 7 Black: Despite other manufacturers’ attempts, there is only one option when it comes to action cameras, and that’s the GoPro. If the Hero 6 is too pricey, check out the Hero 6 which is very similar. (Action cam, $399)
  7. Nikon Coolpix B700: Nikon has an excellent reputation for superzooms, and this model has a crazy 60x optical zoom. It’s a good value option too, with solid reviews, so I have no hesitation suggesting this as an option if you want an all-in-one with scope for more control over your photography. (Superzoom, $450) (Here are some more options to consider at different price points.)
  8. Lumix GX7 or GX8: With a 16MP four thirds sensor, 4K video, touch screen, and Wi-Fi, the GX7 has everything you need for successful shooting with a mirrorless camera. (Mirrorless, $500-$1,200)
  9. Alpha 6300 or A7R III: If you’re on a budget but want to get your foot in the door, the a6300 is the camera for you. For someone with a higher skill level (and significantly higher budget), the A7R III is a top-notch choice, offering a full-frame sensor, super fast processing, a secondary SD slot, and improved battery life. (Mirrorless, $900-$3,200)
  10. X-T2: With an electronic viewfinder, flip-out screen, a secondary SD slot, and improved autofocus, this is a great mirrorless choice for anyone wanting a smaller camera but who still wants full manual control. (Mirrorless, $1,600)
  11. Canon EOS 6D Mark II: I shoot with two of these cameras and am always impressed by their performance, particularly in low light. They are the lightest SLRs with a full-frame sensor, and also have Wi-Fi and GPS, the latter being particularly handy for travel. (DSLR, $1,600)

Getting the Best Travel Lens

If you are buying a mirrorless or SLR system, then you’re going to have to buy a lens. Consider spending at least as much on the lens as the camera body, if not more.

I suggest buying the camera body by itself and then buying a lens to meet your needs rather than the “kit-lens” that might come with it.

A lens has two specifications: focal length and maximum aperture.

The smaller the number of the aperture, the more light the camera will let in, allowing you to achieve various effects (as I described in the second post in this series).

The focal length is the zoom factor of the lens — the bigger the number in mm, the more magnification the lens offers; the smaller the number, the less magnification.

What to look for in a lens

For travel purposes, I’d advise buying two lenses:

  • A cheaper “prime” lens with a fixed focal length of around 50mm and an aperture of 1.8, perfect for portraits or food.
  • A good-quality “walk-around” zoom lens with a wide focal range to let you get everything from wide landscapes to close-up shots of people. Something in the range of 24-105mm would likely do.

The Best Trevl Photography Accessories

Professional photographer getting ready to shoot a nature travel photo with a blue sky
You must factor in some money for purchasing accessories when buying a camera. I’d suggest the following:

  • Spare battery: Most camera batteries last for 300-500 shots, so if you think you’ll be taking a lot of photos and might be away from power for a few days, a second battery could ensure that you don’t miss a moment. I’d advise buying the battery from your manufacturer to guarantee compatibility. Price: usually around $30 USD.
  • External hard drive: Depending on the capacity of your laptop, you might find you need an external hard drive to store your photos. I travel with three Transcend ruggedized hard drives and store backups of my photos across two of them, as well as synchronize them to a cloud-based backup when I have fast enough Internet. Price: currently around $99 USD for a 2TB model.
  • Filters: Lenses aren’t cheap. Pick up a relatively inexpensive UV filter for the front of your lens, and if you scratch it, you’ll just need to replace the filter rather than the whole lens. I would also suggest investing in a polarizing filter (as I mentioned in the second post in the series). Price: the larger the filter, the more expensive it is. $10–100 USD, with Hoya, B+W, and Tiffen being respectable brands.
  • Memory cards: Memory cards are cheap, so pick up one or two Class 10 32Gb or 64Gb cards that’ll let you keep shooting for ages. I’ve not found much difference between brands, and have never had a card fail in all my years shooting. Price: $30 USD for 64Gb.
  • Tripod: A tripod can really expand your creative possibilities, letting you take longer exposures and play with time. Even a small travel tripod can reap dividends for your travel photography. Again though, if you don’t think you’ll use it, don’t buy one. Price: $100 USD will get you a perfectly respectable model. I use the VEO range of Vanguard tripods, which fit nicely into a bag and weigh around 5 lbs, with prices ranging from $100 to $350 USD.

***

Never forget that the most powerful photography tool is you — not your camera! I traveled the world with an old 10-megapixel Canon Rebel SLR for years, producing both award-winning and income-generating photography from — by today’s standards — a very basic bit of kit.

It is far more important to invest time in learning how to take better photos than throwing money at gear. Do your research, figure out your personal travel style, and pick the gear that is right for you, based on weight, price, and your personal learning goals.

If that camera turns out to be a smartphone, awesome. The best camera for traveling is the one you are going to be taking with you whenever you walk out your door and head into the world and the one that fits your budget.

Laurence started his journey in June 2009 after quitting the corporate life and looking for a change of scenery. His blog, Finding the Universe, catalogs his experiences and is a wonderful resource for photography advice! You can also find him on FacebookInstagram, and Twitter.

More Travel Photography Tips!

For more helpful travel photography tips, be sure to check out the rest of Laurence’s travel photography series:

LEARN TO GET OUT OF AUTO!

capture the world photography courseIf you are looking to really get into photography and want to master your camera and take amazing photos when you travel, Laurence and I have developed a comprehensive photography course that will get you out of auto and have your friends go “Wow! That’s really breathtaking!” in no time. Click here to learn more about the course and start today!

Book Your Trip: Logistical Tips and Tricks

Book Your Flight
Find a cheap flight by using Skyscanner or Momondo. They are my two favorite search engines because they search websites and airlines around the globe so you always know no stone is left unturned.

Book Your Accommodation
You can book your hostel with Hostelworld. If you want to stay elsewhere, use Booking.com as they consistently return the cheapest rates for guesthouses and cheap hotels. I use them all the time.

Don’t Forget Travel Insurance
Travel insurance will protect you against illness, injury, theft, and cancellations. It’s comprehensive protection in case anything goes wrong. I never go on a trip without it as I’ve had to use it many times in the past. I’ve been using World Nomads for ten years. My favorite companies that offer the best service and value are:

Looking for the best companies to save money with?
Check out my resource page for the best companies to use when you travel! I list all the ones I use to save money when I travel – and I think will help you too!

The post Camera Gear: The Travel Cameras and Accessories to Buy appeared first on Nomadic Matt's Travel Site.

12 Ways to Shoot the Perfect Travel Photograph

a woman taking a photo
Updated: 12/2/2018 | December 2nd, 2018

­Today, professional photographer Laurence Norah of Finding the Universe, continues his five-part series on taking better travel photos. Photographs are important for the memories they represent so Laurence is here to help us take better pictures! Part two of the series is on how to get the perfect shot.

In my first post in this series, I talked about the key compositional rules that you can use to create better travel photos. If you’re new to this series, I recommend you start there.

Today I’ll be covering how to deal with challenging light and some introducing some advanced ideas for controlling your composition, including being selective with your focus and making objects seem closer together than they are.

Then I’m going to get into specific tips for common travel scenes to get you taking better photos faster.

I’ll begin, though, by talking about the most crucial element of photography — the light. The middle of a sunny day might seem perfect for photography. In truth, it’s the worst time to take pictures — the light is harsh, shadows are challenging, and your photos will not do your subjects justice.

The best times to shoot are closer to sunrise and sunset when the light is soft and warm. These times are known as “the golden hour.”

You can’t be everywhere at the right time for the perfect light, especially when traveling. Here’s how to get the best shot from a bad lighting situation.

12 Ways to Take Better Photos

1. Be Aware of the Sun

This is the most important tip of the lot. Ideally, you want the sun behind you so that your subject is fully lit. If the sun is behind your subject you’ll end up with a much darker, poorly lit image. While this can be done intentionally for effect, for most shots you’ll want the sun to properly light your subject. To do that, position yourself so you are between the sun and your subject, as I did in this shot from my journey around New Zealand:

beautiful travel photograph of a snow-capped mountain in New Zealand

2. Get Creative

Don’t just take the same shot every time. Mix it up and get creative. Instead of having the sun behind you, take advantage of the harsh light for a more interesting image. Try shooting into the sun to create silhouettes, or use a high aperture to create a starburst effect, like in this Napa Valley balloon photo:

Dazzling picture of hot air balloons in Napa Valley, CA

3. Use the Weather

Think about how you can use the weather to your advantage. How can you embrace a grey sky or a rainy landscape to capture a unique photo? How can you snap a picture of a blue sky without it being boring? Be aware of the weather so you can adjust your style and subject accordingly. For example, when the sun is behind clouds, the light is diffused. Clouds also add interest and scale to otherwise plain, boring skies, as in this shot of the Painted Desert in Australia:

Using weather to a photographers advantage when taking a pic of the mountains and sky Painted Desert

4. Seek Shade

If you’re taking pictures of people, find somewhere shady. Here the light will be more even, with fewer harsh shadows on faces. You’ll get a much smoother and more balanced photo. Just make sure you are mindful of where your light is and how dark your subject will be. Here’s an example from the middle of the day in Sri Lanka:

Remote worker working on a laptop traveling to a beach location

5. Master Depth of Field

Depth of field is all about controlling which parts of the shot are in focus. It’s one of the most important photography concepts you’ll need to know if you want to improve your travel photography and capture that perfect shot. Mastering depth of field will allow you to compose a variety of shots just by changing where your focus is. For example, check out this shot of a monkey:

Cute monkey photographed while traveling

As you can see, only the monkey is in focus. This is known as a “shallow” depth of field and is used to isolate subjects and make the shot about them.

A wide depth of field is for shooting landscapes and scenery. Here’s a shot from New Zealand where I used a wide depth of field to get much more of the scene in focus:

Stunning travel photo of a mountain range in New Zealand

To manipulate depth of field on your camera you need to change the aperture — check your manual for how to do that. Typically it will be marked as “Av” or “A” on your mode dial.

Some smartphones allow you to manually set your aperture, either through the built-in camera app, or by downloading an advanced app from your device’s app store.

A wide-open aperture (f/4 and lower) produces a shallower depth of field (less of the shot will be in focus), and a smaller aperture (f/8 and higher) puts more of the scene in focus.

There are plenty of tutorials on the Internet about depth of field; take a look here for a more detailed explanation, and here for a depth of field simulator to get more of a handle on what it is.

6. Utilize Street Scenes

Street photography is about capturing moments — immersing yourself in environments and finding interesting stories.

Patience and politeness are key to successful street shots involving people — not everyone wants to have their photograph taken, and it may be illegal to do so without explicit permission. If no one wants their photo taken, try wider crowd shots, or focus in on market goods — colorful spice piles or unusual-looking goods are always interesting subjects. Alternatively, shoot the streets themselves. Doorways or intriguing architecture are a nice starting point — take this street in Bologna, Italy, for example:

Stunning travel photo of gorgeous street in Bologna, Italy

As for the settings, use a wider depth of field (smaller aperture) for general street scenes.

7. Learn to Photograph People

If you’re looking for portraits, your best bet is to make friends with people. Learn about them and their stories, then ask for that permission.

I prefer taking pictures of people I know, as I generally don’t have to worry about permission problems.

My favorite style of people photos is “candid,” unposed shots. This is the best way, in my opinion, of capturing the personality of people.

Candid travel picture of two people hugging at a party

The key to the art of unobtrusive photography is persistence, patience, and keeping your eyes open to the photographic possibilities around you. Anticipating the moments that might be about to happen is key.

I’d advise a shallow depth of field (wide aperture) and fast shutter speeds for portraits and action shots of people.

8. Use Beaches

Beaches are one of my favorite spots to shoot sunsets — nothing quite beats the sun setting over the sea! The water and the wet sand make for great reflection opportunities.

Think carefully about your composition, and in particular the foreground and mid-ground of your shot, as I talked about in the composition post. Try different angles, and maybe get above your subject to present the beach in the context of its environment, like this shot of Hellfire Beach in Western Australia:

Shot of sunny Hellfire Beach in Western Australia

Outside of sunset, beaches can be very bright environments, so you may need to adjust your exposure to compensate. Most cameras and phones let you shift exposure left or right manually with a button that looks like +/-, or from inside the app.

If you are shooting friends and can’t find shade, consider setting your camera’s flash to “fill” setting to compensate. This uses the flash to light up the shadows caused by the sun, and can make portraits shot into the sun look more pleasing.

Finally, take care of your gear. Fine sand and salt water don’t agree with most camera equipment! Here are some more beach photography tips to get you started.

9. Master Taking Pictures of Landscapes

There are two things that helped my landscape photography improve: a tripod and a polarizing filter (if you’re interested in my photography equipment, here’s a full list of my travel photography gear).

Controlling depth of field is a key part of landscape photography. Unfortunately, as you increase the aperture the shutter speed becomes slower — to the point where your hand movement can result in a blurry image. This is why you need a tripod.

Read more about how shutter speed, ISO (light sensitivity setting), and aperture are linked in this article on the exposure triangle.

A polarizing filter is fantastic for making blue skies and clouds pop, and for controlling reflections. It also reduces the amount of light entering the camera, so that tripod is even more helpful.

If the above two sound like too much effort, don’t worry. You can improve your landscape photography no end by thinking seriously about your composition. Leading lines, the rule of thirds, and finding a sense of scale by putting subjects in your foreground or mid-ground are key.

Captivating photograph of a stone wall door and mountain range in rainy Europe

10. Learn How to Use Low light

So often we’re out with friends at night and want to capture those moments together, but we can’t seem to get anything other than a blurry mess.

This is because most cameras aren’t great when working with the amount of light that’s available at night —they use slow shutter speeds that turn movement into blurs.

More expensive equipment can make a real difference for low-light photography. All is not lost if your pockets aren’t deep enough, though. First, you can increase the ISO setting on your camera. While this will reduce the quality of your shots, they will look better than blurry photos.

Another idea is to find something to rest your camera on. If you don’t have a tripod, try and find an alternative — anything that is stationary and not prone to shake like your hand does. Then, use your camera’s timer function to take the shot. If you’re taking pictures of people, get them to stand as still as possible!

Romantic photo of a nighttime street and canal in Europe

11. Get Action Shots

For better action photos, you have two options. One is to use a fast shutter speed to “freeze” the action — such as a shot of a hummingbird in flight, or a surfer on a wave.

The other option is to show the motion by using a longer shutter speed — the resulting blur will convey a sense of action to your viewer.

In this shot of a train, I manually set the shutter speed to 1/30th of a second, slow enough that the trees at the edge of the shot would seem to be rushing past as I leaned out of the window, yet fast enough that the train itself would remain sharp, even handheld. I think this worked pretty well!

Photo from a fast train passing by a lush landscape

12. Take Pictures of Waterfalls

Waterfalls are a fantastic photography subject. My favorite way to shoot them is with a slow shutter speed, creating a soft and fluffy effect. Shutter speeds of 1/15th of a second and slower give the best results — you’ll need to use a tripod or rest your camera on something to avoid blur from your hand movement.

Another good way to shoot waterfalls is from far away using a long lens, using compression to create a sense of drama around your subject. Or, go the other way, and shoot super-wide, taking in the full glory of the scene.

Finally, don’t forget to use the light. All that flowing water can cause beautiful rainbows, as seen in this shot of Vernal Falls in Yosemite:

Breathtaking photo of the Vernal Falls and a rainbow in Yosemite Nation Park, USA

***
I believe that taking better photos is a combination of three factors — being in the right place at the right time, knowing how your gear works, and knowing how to compose a great shot. Shutter speed and aperture are two key settings in the photographer’s toolbox, and you need to learn how to access and control those modes on your camera.

When you do, you will have much greater creative control over your photography.

Laurence started his journey in June 2009 after quitting the corporate life and looking for a change of scenery. His blog, Finding the Universe, catalogs his experiences and is a wonderful resource for photography advice! You can also find him on FacebookInstagram, and Twitter.

Travel Photography: Learn More Tips

For more helpful travel photography tips, be sure to check out the rest of Laurence’s travel photography series:

LEARN TO GET OUT OF AUTO!

capture the world photography courseIf you are looking to really get into photography and want to master your camera and take amazing photos when you travel, Laurence and I have developed a comprehensive photography course that will get you out of auto and have your friends go “Wow! That’s really breathtaking!” in no time. Click here to learn more about it!

Book Your Trip: Logistical Tips and Tricks

Book Your Flight
Find a cheap flight by using Skyscanner or Momondo. They are my two favorite search engines because they search websites and airlines around the globe so you always know no stone is left unturned.

Book Your Accommodation
You can book your hostel with Hostelworld. If you want to stay elsewhere, use Booking.com as they consistently return the cheapest rates for guesthouses and cheap hotels. I use them all the time.

Don’t Forget Travel Insurance
Travel insurance will protect you against illness, injury, theft, and cancellations. It’s comprehensive protection in case anything goes wrong. I never go on a trip without it as I’ve had to use it many times in the past. I’ve been using World Nomads for ten years. My favorite companies that offer the best service and value are:

Looking for the best companies to save money with?
Check out my resource page for the best companies to use when you travel! I list all the ones I use to save money when I travel – and I think will help you too!

The post 12 Ways to Shoot the Perfect Travel Photograph appeared first on Nomadic Matt's Travel Site.